How to Check the Ram of a Laptop
Wondering how to check the RAM of a laptop? It is easier than you think. Whether you use Windows, macOS, or Linux, there are simple built-in tools that show your memory details in seconds. This guide walks you through every method step by step so you can find your RAM size, type, speed, and usage without any technical skills.
Key Takeaways
- RAM is your laptop’s short-term memory that affects how fast your system runs and how many programs you can use at once.
- Windows users can check RAM through Settings, Task Manager, System Information, or Command Prompt with just a few clicks or commands.
- Mac users can find RAM details under “About This Mac” in the Apple menu for a quick overview of memory specifications.
- Linux users can use commands like “free -h” or “sudo dmidecode” to get detailed RAM information from the terminal.
- Knowing your RAM helps you decide if an upgrade is needed to improve performance for gaming, video editing, or multitasking.
- You can also check RAM usage in real time to see how much memory your apps are consuming right now.
- Third-party tools like CPU-Z provide detailed RAM specs including type, speed, and manufacturer for advanced users.
📑 Table of Contents
- Why You Should Know How to Check the RAM of a Laptop
- What Is RAM and Why Does It Matter?
- How to Check RAM on Windows Laptops
- How to Check RAM on Mac Laptops
- How to Check RAM on Linux Laptops
- Using Third-Party Tools to Check RAM
- How to Check RAM Usage in Real Time
- What to Do After Checking Your RAM
- Conclusion
Why You Should Know How to Check the RAM of a Laptop
If your laptop feels slow or you are thinking about upgrading your memory, the first thing you need to do is check what you already have. Knowing how to check the RAM of a laptop is a basic skill that can save you time, money, and a lot of frustration. RAM, or Random Access Memory, is the short-term memory your computer uses to run programs and process tasks. The more RAM you have, the more smoothly your laptop handles multiple applications at once.
Maybe you are about to install a new program and want to make sure your system meets the requirements. Or perhaps your laptop has been freezing lately, and you suspect your memory is maxed out. Whatever the reason, checking your laptop’s RAM is something every computer owner should know how to do. The good news is that it does not require any special software or technical expertise. Your operating system already has everything you need built right in.
In this guide, we will cover every method for checking RAM on Windows, macOS, and Linux. We will also explain what the numbers mean and how to decide if you need an upgrade. By the end of this article, you will be able to confidently check your laptop’s RAM and understand exactly what those specifications mean for your everyday computing experience.
What Is RAM and Why Does It Matter?
Understanding Random Access Memory
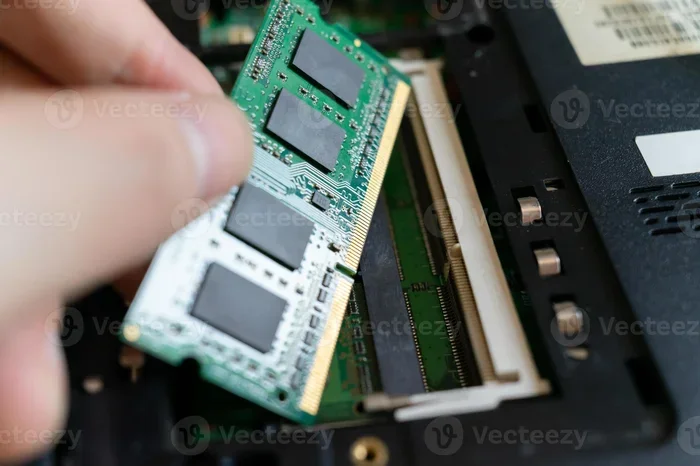
RAM stands for Random Access Memory. It is the temporary storage your laptop uses to hold data that is actively being used or processed. Think of it like a desk where you spread out your work. The bigger the desk, the more papers and projects you can have open at the same time. When you turn off your laptop, everything stored in RAM is erased. That is why your important files need to be saved to your hard drive or SSD for long-term storage.
RAM is different from your hard drive or SSD. Your storage drive holds your files, programs, and operating system permanently. RAM only holds what is currently running. When you open a web browser, a document, or a game, that program gets loaded into RAM so your processor can access it quickly. If you do not have enough RAM, your laptop has to constantly swap data between RAM and your storage drive, which slows everything down dramatically.
How RAM Affects Laptop Performance
The amount of RAM in your laptop directly impacts how well it performs. If you only have 4GB of RAM, you might struggle to run more than a few browser tabs and a word processor at the same time. With 8GB, you can comfortably multitask with several applications open. For demanding tasks like video editing, 3D rendering, or gaming, 16GB or even 32GB may be necessary.
It is not just about the amount of RAM either. The speed of your RAM, measured in MHz, also plays a role. Faster RAM can transfer data more quickly, which improves overall system responsiveness. The type of RAM matters too. Most modern laptops use DDR4 or DDR5 memory, and these are not interchangeable. That is why knowing exactly what type of RAM you have is so important before considering an upgrade.
How to Check RAM on Windows Laptops
Method 1: Using Windows Settings
The easiest way to check your RAM on a Windows laptop is through the Settings app. This method works on both Windows 10 and Windows 11. Here is how to do it step by step.
First, click on the Start menu and select the gear icon to open Settings. Then navigate to the “System” section and scroll down to find “About” in the left sidebar. Under “Device specifications,” you will see a line that says “Installed RAM.” This tells you exactly how much memory your laptop has. For example, it might say “8.00 GB” or “16.00 GB.” This is the quickest method and gives you a clear answer in just a few clicks.
Method 2: Using Task Manager
Task Manager is another great tool for checking your RAM, and it also shows you how much memory is currently being used. To open Task Manager, right-click on the taskbar at the bottom of your screen and select “Task Manager” from the menu. You can also press Ctrl + Shift + Esc on your keyboard to open it directly.
Once Task Manager is open, click on the “Performance” tab at the top. Then select “Memory” from the left panel. Here you will see a wealth of information. At the top right, it shows the total amount of RAM installed. Below that, you will see how much is currently in use and how much is available. You can also see the speed of your RAM, the form factor, and how many slots are being used. This is incredibly useful if you are planning an upgrade and want to know if you have empty slots available.
Method 3: Using System Information
For even more detailed information, you can use the System Information tool. Press the Windows key + R on your keyboard to open the Run dialog box. Type “msinfo32” and press Enter. This will open the System Information window.
In the System Summary section, look for “Installed Physical Memory (RAM).” This shows the total amount of memory in your laptop. You can also find details about your system model, processor, and other hardware components here. This method is particularly useful if you need to provide your laptop’s specifications for technical support or when shopping for compatible RAM upgrades.
Method 4: Using Command Prompt
If you prefer using command-line tools, you can check your RAM through Command Prompt. Open Command Prompt by typing “cmd” in the Start menu search bar and pressing Enter. Then type the following command and press Enter.
wmic memorychip get capacity, speed, memorytype, manufacturer
This command displays the capacity of each RAM stick, its speed, the memory type, and the manufacturer. If you have two RAM sticks, you will see two entries. To get the total RAM, you can add up the individual capacities. Each value is shown in bytes, so you will need to divide by 1,073,741,824 to convert to gigabytes. For example, a value of 8,589,934,592 bytes equals 8GB.
Another useful command is systeminfo | findstr /C:”Total Physical Memory”. This gives you a quick summary of your total installed RAM without any extra details. It is a fast way to get the information you need.
How to Check RAM on Mac Laptops
Using About This Mac
Checking RAM on a Mac is just as simple as on Windows. Click on the Apple logo in the top-left corner of your screen and select “About This Mac” from the dropdown menu. A window will appear with an overview of your Mac’s specifications.
On the “Overview” tab, you will see a line labeled “Memory” that tells you how much RAM your Mac has and what type it is. For example, it might say “8 GB 2133 MHz LPDDR3.” This gives you both the capacity and the speed of your memory. If you click on the “System Report” button, you can get even more detailed information about each memory slot and the specific RAM modules installed.
Using Activity Monitor
If you want to see how your RAM is being used in real time, open Activity Monitor. You can find it by going to Applications > Utilities > Activity Monitor, or by searching for it with Spotlight (press Command + Space and type “Activity Monitor”).
Click on the “Memory” tab at the top. At the bottom of the window, you will see a breakdown of your memory usage. It shows how much RAM is being used by apps, how much is wired (reserved for the system), and how much is available. There is also a “Memory Pressure” graph that shows green, yellow, or red. Green means your Mac has plenty of RAM. Yellow means it is starting to work harder. Red means you are running low and should consider closing some apps or upgrading your memory.
How to Check RAM on Linux Laptops
Using the Free Command
Linux users have several powerful command-line tools for checking RAM. The simplest is the “free” command. Open a terminal and type free -h and press Enter. The “-h” flag makes the output human-readable by showing values in gigabytes and megabytes instead of bytes.
The output shows total memory, used memory, free memory, shared memory, buffer/cache, and available memory. The “available” column is the most important because it shows how much memory is actually free for new applications to use. This is a quick and easy way to get a snapshot of your RAM situation.
Using the Dmidecode Command
For detailed hardware information about your RAM, use the dmidecode command. Type sudo dmidecode -t memory in the terminal and press Enter. You will need to enter your password since this command requires administrator privileges.
This command provides a wealth of information about each RAM module installed in your laptop. You will see details like the size, type (DDR3, DDR4, DDR5), speed, manufacturer, part number, and serial number. This is the most comprehensive way to check your RAM specs on Linux and is especially useful when you need to find compatible replacement or upgrade modules.
Using the /proc/meminfo File
Another way to check your RAM on Linux is by reading the /proc/meminfo file. Type cat /proc/meminfo in the terminal and press Enter. This displays a detailed list of memory statistics including total RAM, free memory, buffers, cached memory, and swap space.
While this output can look overwhelming at first, the key line to look for is “MemTotal.” This shows the total amount of RAM installed in your system in kilobytes. Divide this number by 1,048,576 to convert it to gigabytes. For example, a MemTotal value of 8,388,608 kB equals 8GB of RAM.
Using Third-Party Tools to Check RAM
CPU-Z for Windows
If you want a more user-friendly way to check detailed RAM specifications, CPU-Z is an excellent free tool. Download it from the official website, install it, and open the program. Click on the “Memory” tab to see your RAM type, size, channel configuration, and frequency.
CPU-Z also has a “SPD” tab that shows detailed information about each individual RAM slot. You can see the manufacturer, part number, serial number, and supported timings for each module. This is incredibly helpful when you are shopping for RAM upgrades because you can match the exact specifications of your current memory.
Speccy for Windows
Speccy is another popular free tool that provides a clean overview of all your system hardware, including RAM. After installing and opening Speccy, click on the “RAM” section in the left sidebar. You will see the total amount of RAM, the type, the number of slots used, and detailed information about each stick.
Speccy also shows the current operating frequency and timings of your RAM. This is useful if you want to verify that your memory is running at its advertised speed. Sometimes RAM runs at a lower speed than its maximum rating, and Speccy helps you identify that.
Hardinfo for Linux
Linux users who prefer a graphical interface can use Hardinfo. Install it from your distribution’s package manager and open it. Navigate to “Memory” under “Devices” to see your total RAM, type, and speed. Hardinfo also provides a summary page that shows all your system specifications in one place.
How to Check RAM Usage in Real Time
Why Monitoring RAM Usage Matters
Knowing how much RAM you have is only half the story. Understanding how your RAM is being used helps you identify performance bottlenecks. If your RAM usage is consistently near 100%, your laptop will feel sluggish because it has to rely on slower virtual memory stored on your hard drive or SSD.
Monitoring RAM usage can also help you identify memory-hungry applications. Sometimes a single app or browser tab can consume gigabytes of memory. By keeping an eye on your RAM usage, you can close unnecessary programs and free up memory for the tasks that matter most.
Using Built-In Tools to Monitor Usage
On Windows, Task Manager is your best friend for monitoring RAM usage. Open it with Ctrl + Shift + Esc, go to the “Processes” tab, and click on the “Memory” column header to sort applications by how much RAM they are using. The apps at the top of the list are consuming the most memory.
On Mac, Activity Monitor serves the same purpose. Open it, click the “Memory” tab, and sort by the “Memory” column to see which apps are using the most RAM. On Linux, you can use the “top” or “htop” command in the terminal to see real-time memory usage by process.
What to Do After Checking Your RAM
Deciding If You Need More RAM
After you check the RAM of your laptop, you might wonder if it is enough. For basic tasks like web browsing, email, and word processing, 8GB is generally sufficient. If you do photo editing, light video editing, or moderate gaming, 16GB is a sweet spot. For professional video editing, 3D modeling, or heavy multitasking, 32GB or more is recommended.
If you find that your RAM usage is consistently above 80-90% during normal use, it is a clear sign that you would benefit from an upgrade. You can learn more about determining the right amount of memory by reading our guide on how much RAM is good for a laptop.
Upgrading Your Laptop RAM
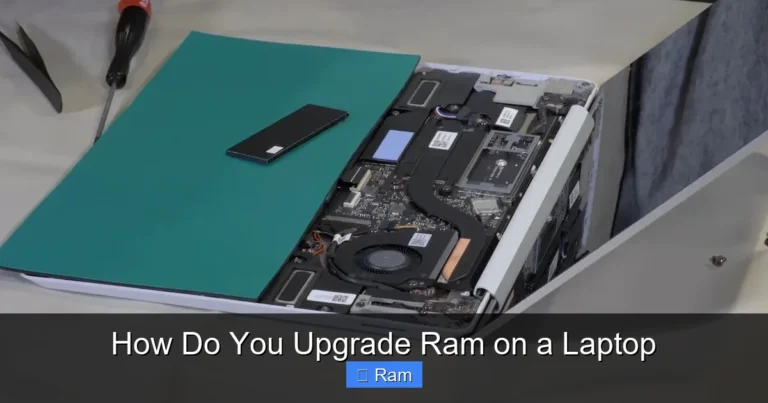
If you decide to upgrade, the first step is to check if your laptop’s RAM is upgradeable. Many modern laptops, especially ultrabooks and MacBooks, have RAM soldered to the motherboard, which means it cannot be replaced. You can check your laptop’s manual or manufacturer’s website to find out if your model supports RAM upgrades.
If your laptop does support upgrades, make sure to buy the correct type of RAM. Match the DDR generation, speed, and form factor to what your laptop requires. Our detailed guide on how to upgrade RAM on a laptop walks you through the entire process from start to finish.
For those who are new to hardware upgrades, you might also want to check out our article on how to install RAM into a a laptop for a step-by-step walkthrough with photos and tips to make the process stress-free.
Conclusion
Learning how to check the RAM of a laptop is a simple but essential skill for any computer user. Whether you are troubleshooting performance issues, planning an upgrade, or just curious about your system’s specifications, the methods we covered in this guide make it easy to find the information you need. Windows, macOS, and Linux all offer built-in tools that give you detailed RAM information in just a few clicks or commands.
Remember that RAM is one of the most important components affecting your laptop’s performance. By regularly checking your RAM usage and understanding your system’s memory specifications, you can make informed decisions about upgrades and keep your laptop running smoothly for years to come. Do not let a lack of memory hold you back from getting the most out of your machine.
Frequently Asked Questions
How do I check how much RAM my laptop has on Windows 11?
Open Settings by pressing Windows key + I, then go to System > About. Under “Device specifications,” you will see “Installed RAM” which shows your total memory. You can also open Task Manager with Ctrl + Shift + Esc and check the Performance tab for more detailed information.
Can I check my laptop’s RAM without opening it?
Absolutely. You do not need to open your laptop to check the RAM. All major operating systems have built-in tools that display your memory specifications. On Windows, use Settings or Task Manager. On Mac, use About This Mac. On Linux, use the “free -h” command in the terminal.
How do I know if my laptop RAM is upgradeable?
Check your laptop’s user manual or the manufacturer’s website to see if the RAM is soldered or replaceable. Many ultrabooks and all recent MacBooks have soldered RAM that cannot be upgraded. Gaming laptops and business laptops often have accessible RAM slots. You can also use tools like CPU-Z to see how many RAM slots your laptop has and how many are currently in use.
What is the difference between RAM and storage?
RAM is temporary memory that holds data for programs currently running. It is fast but clears when you shut down your laptop. Storage, like an SSD or hard drive, is permanent memory that holds your files, apps, and operating system even when the laptop is off. Think of RAM as your desk space and storage as your filing cabinet.
How much RAM do I need for everyday laptop use?
For basic tasks like web browsing, email, and document editing, 8GB of RAM is sufficient. If you multitask heavily, do photo editing, or play casual games, 16GB is recommended. For professional work like video editing, 3D rendering, or running virtual machines, 32GB or more is ideal.
Why does my laptop show less RAM than what I installed?
This is common and usually happens because some RAM is reserved by the system for hardware like the integrated graphics card. On 32-bit versions of Windows, the system can only recognize up to 4GB of RAM. Make sure you are running a 64-bit operating system to access all your installed memory.