How to Wire Speakers with 4 Terminals

Connecting speakers that have four terminals isn’t as tricky as it sounds. This guide walks you through every detail—from identifying the terminals to wiring them correctly—so you can enjoy perfect audio without guesswork. Follow our simple steps and start hearing the difference today.
Key Takeaways
- Identify each terminal: Know which are positive, negative, high‑pass, and low‑pass before you begin.
- Use the right gauge wire: Proper gauge prevents signal loss and protects your amp.
- Match impedance: Keep speaker and amp impedance compatible for safe, clean sound.
- Secure connections: Tight, corrosion‑free terminals ensure reliability.
- Test before finalizing: A quick check saves time and avoids damage.
- Document your wiring: A simple diagram helps future upgrades or troubleshooting.
- Safety first: Always disconnect power before handling any wires.
📑 Table of Contents
- Introduction: Why Four‑Terminal Speakers Need Special Care
- 1. Understanding the Four Terminals
- 2. Gathering the Right Tools and Materials
- 3. Preparing Your Speakers and Amplifier
- 4. Step‑by‑Step Wiring Process
- 5. Testing and Fine‑Tuning
- 6. Advanced Topics: Bi‑Amping and Using External Crossovers
- Conclusion: Your Sound, Your Way
Introduction: Why Four‑Terminal Speakers Need Special Care
If you’ve ever opened a bookshelf speaker or a home‑theater box and seen four tiny metal posts, you might wonder what they’re for. Those four terminals are not random; they give you control over how the driver’s signal is split between the tweeter, mid‑range, and woofer. Properly wiring them can unlock the full potential of your speakers, delivering richer highs, tighter mids, and deeper lows.
In this friendly guide we’ll walk through everything you need to know to wire speakers with 4 terminals confidently. We’ll keep the language simple, use short sentences, and sprinkle practical tips so you never feel lost. By the end, you’ll be able to connect your speakers like a pro, whether you’re setting up a new home theater or upgrading an old stereo.
1. Understanding the Four Terminals
What Each Terminal Represents
Most four‑terminal speakers follow a standard naming convention:

Visual guide about How to Wire Speakers with 4 Terminals
Image source: atshq.org
- + (Positive) – High‑Pass (HP): Sends high‑frequency signals to the tweeter.
- – (Negative) – High‑Pass (HP): Completes the tweeter circuit.
- + (Positive) – Low‑Pass (LP): Sends low‑frequency signals to the woofer.
- – (Negative) – Low‑Pass (LP): Completes the woofer circuit.
Some manufacturers label them “HF+”, “HF–”, “LF+”, and “LF–”. Others use colors—red for positive, black for negative, and sometimes a second set of colors for the crossover side. Check the speaker’s manual for exact labeling.
Why a Crossover Matters
The crossover inside the speaker splits the audio signal. It ensures the tweeter only receives frequencies it can handle, while the woofer gets the bass. Wiring the terminals correctly respects this division, preventing distortion or damage.
2. Gathering the Right Tools and Materials
Essential Tools
- Wire strippers (preferably 22‑18 AWG compatible)
- Flat‑head screwdriver or terminal wrench
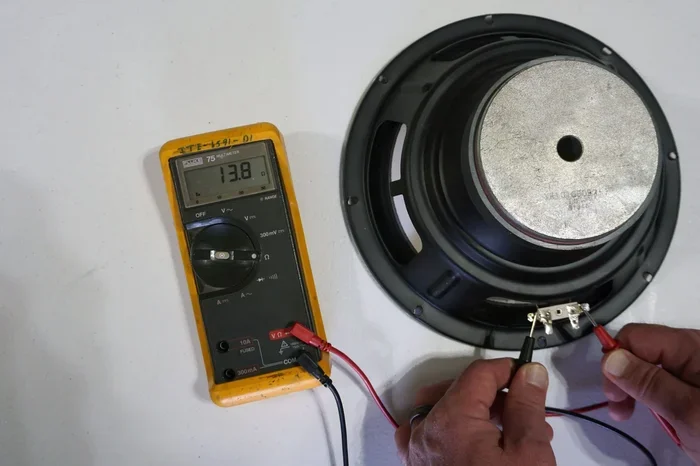
- Multimeter (for checking continuity)
- Heat‑shrink tubing or electrical tape
- Label maker or masking tape for documentation
Choosing the Correct Wire Gauge
For most home‑theater setups, 16‑gauge speaker wire is sufficient. If you’re running long distances (over 50 ft) or using high‑power amps, step up to 14‑gauge to reduce resistance. Thinner wire (18‑gauge) can work for short runs but may cause a slight loss in high‑frequency detail.

Visual guide about How to Wire Speakers with 4 Terminals
Image source: wallpaperaccess.com
Optional Extras
Consider buying a small connector block. It makes swapping wires easier and keeps your setup tidy. Also, a pair of cable ties helps bundle wires neatly behind your amp or receiver.
3. Preparing Your Speakers and Amplifier
Safety First: Power Off
Never start wiring with the amp turned on. Unplug the power cord or switch the unit off at the wall. This protects you and the equipment from short circuits.

Visual guide about How to Wire Speakers with 4 Terminals
Image source: ww1.hdnux.com
Inspecting the Terminals
Look for corrosion, loose screws, or broken tabs. Clean any oxidation with a little contact cleaner and a cotton swab. Tighten the terminal screws just enough to hold the wire firmly without crushing it.
Matching Impedance
Most home speakers are rated at 8 Ω. Your amp should list a compatible range, usually 4‑8 Ω. If you connect a 4 Ω speaker to an amp that only supports 8 Ω, you risk overheating. Double‑check both specs before proceeding.
4. Step‑by‑Step Wiring Process
Step 1: Strip the Wire Ends
Using your wire stripper, remove about ½ inch of insulation from each end of the speaker wire. Do this for both the high‑pass and low‑pass leads if you are using separate cables.
Step 2: Identify the Correct Wire Pair
If you’re using a single two‑conductor cable, you’ll need to split it:
- Red (or marked) conductor → Positive terminals.
- Black (or unmarked) conductor → Negative terminals.
For a four‑terminal speaker, you’ll run two separate pairs: one pair for the tweeter (HP) and one pair for the woofer (LP).
Step 3: Connect the High‑Pass Pair
Take the first pair of wires. Twist the exposed strands together, then insert them into the “+ (HP)” terminal. Tighten the screw securely. Repeat for the “– (HP)” terminal using the opposite wire.
Step 4: Connect the Low‑Pass Pair
Do the same with the second pair of wires, this time connecting to the “+ (LP)” and “– (LP)” terminals. Make sure the wires are not crossing over each other, which could cause a short.
Step 5: Secure and Insulate
Slide a piece of heat‑shrink tubing over each connection, then use a hair dryer or heat gun to shrink it. If you don’t have heat‑shrink, wrap each terminal with electrical tape. This prevents accidental contact.
Step 6: Label Your Wires
Use a label maker or a piece of masking tape to mark each wire end: “HP‑Pos”, “HP‑Neg”, “LP‑Pos”, “LP‑Neg”. A quick glance later will save you time if you ever need to re‑wire.
Step 7: Connect to the Amplifier
Now turn to your amp. Most modern receivers have a “Speaker A” and “Speaker B” set of binding posts. Match the positive (+) and negative (–) on the amp to the corresponding speaker terminals. If your amp has dedicated high‑pass/low‑pass outputs, use them; otherwise, you can run a single pair from the amp to a speaker’s binding posts and let the internal crossover handle the split.
Step 8: Double‑Check All Connections
With a multimeter set to continuity, test each pair. Touch one probe to the positive terminal on the speaker and the other to the matching amp terminal; you should hear a beep. Repeat for all four connections.
5. Testing and Fine‑Tuning
Initial Power‑On Test
Plug the amp back in and turn it on at a low volume. Play a familiar track that has clear bass, mids, and treble. Listen for any distortion, rattling, or missing frequencies.
Balancing the Crossover
If the tweeter sounds too loud or the bass is weak, you may need to adjust the internal crossover (if it’s a user‑adjustable type). Some speakers have tiny potentiometers on the back—turn clockwise to increase output, counter‑clockwise to decrease.
Room Placement Tips
Even perfectly wired speakers benefit from good placement. Keep tweeters at ear level, and avoid placing woofers directly against walls if you want tighter bass. Small adjustments can make a big difference.
Common Issues and Quick Fixes
- No Sound from Tweeter: Check the HP connections and ensure the crossover isn’t set to a high cutoff frequency.
- Buzzing or Hum: Look for ground loops. Using a single‑point ground or a short ground lift cable can help.
- One Speaker Silent: Verify that the amp channel isn’t muted and that the speaker’s positive and negative wires aren’t swapped.
6. Advanced Topics: Bi‑Amping and Using External Crossovers
What Is Bi‑Amping?
Bi‑amping means using two separate amplifier channels—one for the high frequencies and one for the low frequencies—by feeding each pair of terminals directly from the amp. This can improve control and reduce distortion.
Wiring for Bi‑Amp
To bi‑amp, you’ll need an amp with at least four dedicated outputs (or two stereo amps). Connect the HP pair to one set of outputs and the LP pair to another. Make sure the amp’s total power rating matches the speaker’s specifications.
External Crossovers
If you prefer more control, you can replace the internal crossover with an external unit. Connect the amp’s left and right channels to the external crossover’s inputs, then run the HP and LP outputs to the speaker’s respective terminals. This setup is popular among audiophiles who want precise frequency division.
When to Stick With the Stock Crossover
For most casual listeners, the built‑in crossover does a fine job. Only consider external solutions if you’re chasing high‑end performance or need to match mismatched drivers.
Conclusion: Your Sound, Your Way
Wiring speakers with 4 terminals may look intimidating at first, but with the right preparation it’s a straightforward process. By identifying each terminal, using the proper gauge wire, and following the step‑by‑step guide, you’ll unlock the full range of your speakers and enjoy clearer, more balanced audio.
Remember to always power down before you touch any wires, double‑check your connections, and test the system before you settle in for a movie night. With these habits, troubleshooting becomes a breeze, and you’ll have the confidence to upgrade or expand your setup in the future.
Ready to take the next step? Check out our guide on how to wire speakers to amp for deeper insight into matching amps and speakers, or explore other audio projects on our site.
Frequently Asked Questions
What does each of the four terminals on a speaker do?
The four terminals are usually split into high‑pass (+ and –) for the tweeter and low‑pass (+ and –) for the woofer. They let the internal crossover send the right frequencies to each driver.
Can I use a single speaker cable for both the high‑pass and low‑pass connections?
Yes, if the speaker’s internal crossover is designed for a single pair of connections. However, using separate pairs gives you more control and reduces the chance of signal loss.
Do I need a special type of wire for four‑terminal speakers?
Standard speaker wire works fine. Just choose the appropriate gauge—16‑gauge for most home setups, 14‑gauge for long runs or high‑power amps.
Is bi‑amping necessary for better sound?
Bi‑amping can improve clarity and control, but it’s not required for good sound. It’s most beneficial for high‑end systems where each driver gets dedicated amplification.
How can I tell if my wiring is correct before turning the amp on?
Use a multimeter set to continuity. Touch one probe to the amp’s positive terminal and the other to the speaker’s matching positive terminal; a beep means a good connection.
What should I do if I hear a buzzing sound after wiring?
Buzzing often indicates a ground loop or a loose connection. Re‑check all terminals, tighten screws, and consider using a ground lift adapter if the hum persists.