3 Way Component Speakers for Car

Looking for crystal‑clear highs, punchy mids, and thunderous bass in your car? 3 way component speakers for car systems split the sound into three dedicated drivers, delivering studio‑grade audio on the road. This guide walks you through the tech, buying tips, and step‑by‑step installation so you can hear every note the way it was meant to be heard.
Key Takeaways
- Three drivers, one purpose: A tweeter, midrange, and woofer work together for balanced sound.
- Component vs. coaxial: Components give better imaging and detail than all‑in‑one speakers.
- Crossover matters: A good 3 way crossover (see our guide) directs each frequency to the right driver.
- Power matching: Pair speakers with an amp that meets the RMS wattage for clean volume.
- Installation tips: Proper mounting, wiring, and sealing prevent rattles and loss of fidelity.
- Budget options exist: You don’t need a $1,000 system to enjoy noticeable upgrades.
- Maintenance is simple: Keep cones clean and check connections for long‑term performance.
📑 Table of Contents
- What Makes a 3 Way Component Speaker Different?
- Core Components of a 3 Way System
- How to Choose the Right 3 Way Component Speakers for Your Car
- Installation: Step‑by‑Step Guide
- Performance Boost: Tips to Get the Most Out of Your 3 Way Component Speakers
- Common Mistakes to Avoid
- Is a 3 Way Component System Right for You?
- Conclusion
What Makes a 3 Way Component Speaker Different?
When you hear the word “component” you might picture a fancy sound system, and you’d be right. A 3 way component speaker splits the audio spectrum into three separate zones:
- Tweeter: Handles the highest frequencies (10 kHz‑20 kHz). It adds sparkle to cymbals, vocals, and high‑pitched instruments.
- Midrange (or mid‑woofer): Covers the crucial mid‑range band (500 Hz‑5 kHz) where most musical information lives.
- Woofer: Takes care of the low end (20 Hz‑500 Hz), delivering the thump you feel in your seat.
Because each driver is purpose‑built, distortion is minimized and the soundstage becomes wider and more precise. In contrast, a coaxial speaker stacks all drivers on a single cone, which can cause interference and a narrower image.
Why “3 Way” Matters
The term “3 way” simply states that three distinct drivers are used. This is different from “2 way” systems that combine mids and highs in one driver, often sacrificing detail in one region or the other. With three separate drivers, you get:
- Clearer highs without sacrificing bass.
- Better imaging—sounds seem to come from specific points, not a single blob.
- More efficient power use because each driver only handles the frequencies it’s built for.
Core Components of a 3 Way System
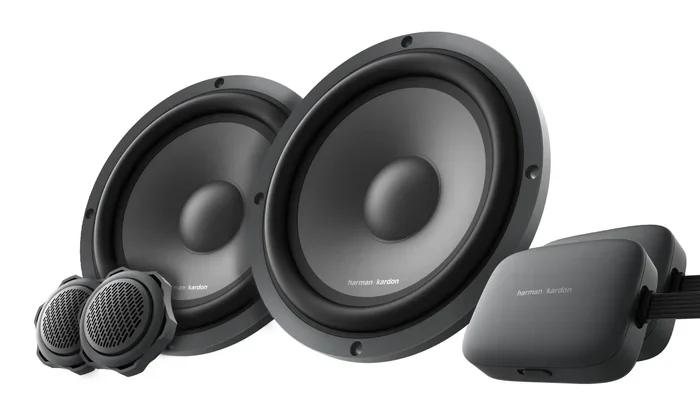
Before you buy, it helps to know the parts that make up a complete 3 way component speaker for car installations.

Visual guide about 3 Way Component Speakers for Car
Image source: phanmemeta.com
1. Tweeter
Tweeters are usually dome‑shaped or horn‑loaded. Dome tweeters give a smoother, more natural high‑frequency response, while horn tweeters can add extra gain and directivity. When choosing, look for a tweeter with a low distortion rating (THD < 1 %).
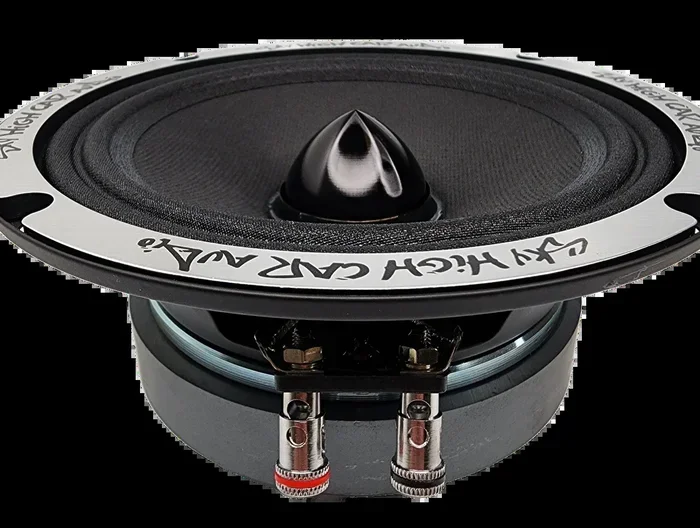
2. Midrange Driver
The midrange driver is the heart of the system. It often comes as a separate cone or as a “mid‑woofer” that handles both mids and some low frequencies. Materials like paper, kevlar, or polypropylene each give a slightly different tonal character.
3. Woofer
Woofers in car component sets range from 4 in to 6.5 in. Larger woofers move more air, producing deeper bass, but they also need more power. Check the RMS (continuous) power rating and match it to your amplifier.
4. Crossover Network
The crossover splits the incoming audio signal into three bands and sends each to the correct driver. A well‑designed 3 way crossover for speakers uses high‑quality inductors, capacitors, and sometimes resistors to ensure a smooth transition between drivers.
5. Mounting Hardware
Most component kits include brackets, screws, and sometimes foam gaskets. Proper mounting keeps the drivers aligned and prevents vibration‑induced rattles.
How to Choose the Right 3 Way Component Speakers for Your Car
Picking the perfect set can feel overwhelming, but focusing on a few key criteria will narrow the field quickly.

Visual guide about 3 Way Component Speakers for Car
Image source: ketoanthienung.vn
Power Handling (RMS vs. Peak)
RMS (root‑mean‑square) power is the continuous power a speaker can handle without distortion. Always match or exceed the RMS rating of the speakers with your amplifier’s RMS output. For example, if a set lists 80 W RMS per driver, look for an amp that can deliver at least that amount cleanly. Does wattage matter for car speakers – the answer is a big yes.
Impedance
Most car component speakers are 4 Ω, but 2 Ω options exist for higher power demand. Make sure your amp can handle the impedance; otherwise you risk overheating.
Frequency Response
A good 3 way set should cover roughly 20 Hz‑20 kHz. Check the specs: a tweeter that starts at 2 kHz, a midrange from 500 Hz‑4 kHz, and a woofer down to 30 Hz are typical.
Build Quality and Materials
Look for reinforced cones, rubber surrounds, and corrosion‑resistant terminals. These details affect durability, especially in a car’s temperature‑fluctuating environment.
Size and Fit
Measure your door panels, dash, or rear deck. Common sizes are 6 × 9 in, 6 × 8 in, and 5 × 7 in. If you’re unsure, the 6 3 4 Car Speakers guide can help you determine which dimensions fit most factory openings.
Budget vs. Premium
Entry‑level component sets start around $80‑$120 and provide a noticeable upgrade over stock speakers. Mid‑range options ($150‑$250) often include better tweeters and more robust crossovers. Premium kits ($300+), such as those from Alpine, Focal, or JL Audio, use exotic materials and offer the most accurate soundstage.
Installation: Step‑by‑Step Guide
Installing 3 way component speakers isn’t rocket science, but a careful approach ensures the best sound and avoids damage.

Visual guide about 3 Way Component Speakers for Car
Image source: media.daotaoajc.edu.vn
Tools You’ll Need
- Screwdriver set (Phillips & flathead)
- Panel removal tool or trim puller
- Wire stripper/crimper
- Die‑cast mounting brackets (often included)
- Electrical tape or heat‑shrink tubing
- Sound deadening material (optional but recommended)
Step 1 – Remove Existing Speakers
Turn off the car and disconnect the battery. Use the panel removal tool to gently pry off door panels or dash covers. Unscrew the factory speakers and disconnect the wiring harness.
Step 2 – Prepare the Mounting Area
Clean the cavity, remove any old foam, and apply a thin layer of sound deadening if you want extra vibration control. This also prevents rattles.
Step 3 – Install the Woofer
Place the woofer into the mounting hole, align the screw holes, and secure it with the supplied brackets. Make sure the cone faces outward and the rubber surround isn’t twisted.
Step 4 – Mount the Tweeter and Midrange
Most kits include a separate “tweeter holder” that slides into a small opening near the door’s top edge. Secure the tweeter with its clip, then attach the midrange driver using the provided bracket. Aim the tweeter slightly upward for optimal listening height.
Step 5 – Wire the Crossover
Connect the speaker wires to the crossover’s inputs (usually labeled “Woofer,” “Mid,” and “Tweeter”). Then run the output leads to the corresponding drivers. Keep wires tidy and use heat‑shrink to protect the connections.
Step 6 – Connect to the Amplifier
If you’re adding an amp, run a power cable from the battery (with an inline fuse), a ground strap to a clean metal point, and RCA cables from the head unit to the amp. Match the amp’s channel output to the speaker’s RMS rating.
Step 7 – Test and Fine‑Tune
Reconnect the battery, power on the system, and play a familiar track. Listen for balanced highs, mids, and bass. Adjust the crossover’s sliders (if adjustable) and the amp’s gain until the sound is clean and distortion‑free.
Performance Boost: Tips to Get the Most Out of Your 3 Way Component Speakers
Even the best speakers need a little tweaking to shine in a car’s acoustic environment.
1. Use Quality Cables
Oxygen‑free copper (OFC) speaker wire reduces resistance and improves clarity. For long runs, consider a thicker gauge (16‑18 AWG).
2. Seal Gaps
Any air leaks around the speaker opening can cause muffled sound. Use automotive sealant or foam tape to close gaps.
3. Add Sound Deadening
Applying a layer of Dynamat or similar material to doors and panels reduces vibration, making the bass tighter and the overall sound cleaner.
4. Balance the Amp Settings
Set the low‑pass filter for the woofer at around 80‑120 Hz, the mid‑range filter at 500‑800 Hz, and the high‑pass filter for the tweeter at 4‑5 kHz. These are starting points; adjust to taste.
5. Keep the System Cool
Amplifiers can get hot, especially under heavy bass. Ensure adequate ventilation and consider a fan if the amp sits in a tight space.
Common Mistakes to Avoid
Even seasoned DIYers slip up. Here are pitfalls that can ruin your listening experience.
- Over‑powering: Feeding more watts than the speaker’s RMS rating leads to distortion and potential damage.
- Wrong Impedance Match: Using a 2 Ω speaker on a 4 Ω‑only amp can overheat the amp.
- Skipping the Crossover: Directly wiring the tweeter to full‑range signals creates harshness.
- Poor Wiring: Loose connections cause crackling and intermittent sound.
- Improper Mounting: Tilting the drivers or leaving gaps reduces imaging and introduces rattles.
Is a 3 Way Component System Right for You?
If you love music and want your car to sound like a small concert hall, the answer is a resounding yes. However, if you only listen to talk radio or need a budget‑friendly upgrade, a high‑quality coaxial set might be sufficient.
Consider your listening habits, budget, and willingness to install. Remember, a great speaker is only as good as the amp and source feeding it. Pairing your 3 way component speakers with a clean head unit or a dedicated recommended car amp for 6 speakers will unlock their full potential.
Conclusion
3 way component speakers for car audio bring studio‑grade clarity, depth, and imaging to the everyday driver. By understanding the three‑driver design, choosing the right power match, and installing them with care, you can transform your commute into a musical journey. Whether you opt for an affordable entry‑level kit or a premium flagship model, the principles stay the same: quality drivers, a solid crossover, and proper installation. Follow the steps and tips in this guide, and you’ll hear the difference from the first drive out of the shop.
Frequently Asked Questions
What is the difference between 2 way and 3 way component speakers?
2 way systems use a woofer and a tweeter, sharing the mid frequencies. 3 way speakers add a dedicated midrange driver, giving clearer mids and better overall balance.
Do I need a separate amplifier for 3 way component speakers?
While you can run them from a factory head unit, a dedicated amp provides the power and control needed for clean, distortion‑free sound, especially at higher volumes.
Can I install 3 way component speakers myself?
Yes. With basic tools, a wiring diagram, and patience, most DIYers can replace factory speakers in doors or the dash. Follow the step‑by‑step guide above.
How important is the crossover for a 3 way system?
Extremely important. The crossover directs the correct frequency range to each driver. A well‑designed crossover prevents overlap and distortion, ensuring each driver performs optimally.
What size 3 way component speakers fit most cars?
6 × 9 in and 6 × 8 in are the most common sizes for front doors. Check your vehicle’s specifications or use the 6 3 4 Car Speakers guide to confirm.
Will 3 way component speakers improve bass response?
Yes, the dedicated woofer handles low frequencies more efficiently than coaxial speakers, delivering tighter and deeper bass, especially when paired with a good amp and proper enclosure.