Lock Laptop Keyboard
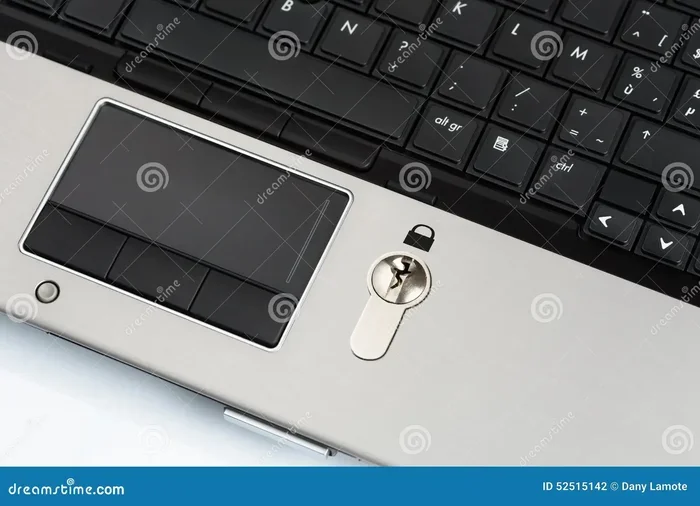
Locking your laptop keyboard is a simple but powerful way to prevent accidental keystrokes, protect your data, and keep your device safe from pets or children. Whether you use Windows, Mac, or need a BIOS-level solution, this guide walks you through every method with clear, easy-to-follow steps. You will learn keyboard shortcuts, built-in settings, third-party tools, and troubleshooting tips to get your laptop keyboard locked in minutes.
Have you ever accidentally typed a bunch of gibberish while cleaning your laptop or reached for a snack and knocked a bunch of keys? It happens to all of us. A lock laptop keyboard is one of the simplest things you can do to save yourself from headaches. Whether you are cleaning your screen, presenting to a room full of people, or just want to keep your curious toddler from typing random stuff, locking the keyboard comes in handy more often than you might think.
This guide covers every way you can lock your laptop keyboard. We will walk through Windows shortcuts, Mac settings, BIOS options, and even third-party tools. Each method is explained in plain language so anyone can follow along. By the end, you will know exactly how to lock your keyboard and how to unlock it just as fast.
Before we dive in, let us quickly talk about why this matters. A laptop keyboard that keeps registering random keypresses can mess up your work, delete important files, or even change system settings without you knowing. Locking it gives you peace of mind. It is a small habit that saves a lot of trouble down the road.
Key Takeaways
- Multiple Methods Available: You can lock your laptop keyboard using built-in Windows settings, keyboard shortcuts, Mac System Preferences, BIOS settings, or third-party software.
- Prevents Accidental Input: Locking the keyboard stops pets, children, or accidental touches from triggering unwanted commands or deleting important work.
- Easy to Reverse: Every locking method can be undone quickly, so you are never stuck without access to your laptop keyboard.
- Works Across Brands: These methods apply to HP, Dell, Lenovo, Acer, and other laptop brands without special hardware.
- Boosts Productivity: A locked keyboard helps you focus during presentations, cleaning, or when using an external keyboard instead.
📑 Table of Contents
- Why You Should Lock Your Laptop Keyboard
- How to Lock Laptop Keyboard on Windows
- How to Lock Laptop Keyboard on Mac
- BIOS and UEFI Level Keyboard Lock
- Using Third-Party Software to Lock Your Laptop Keyboard
- Troubleshooting Common Keyboard Lock Issues
- Tips for Everyday Keyboard Locking Habits
- Comparison of Keyboard Lock Methods
- Final Thoughts
Why You Should Lock Your Laptop Keyboard
Locking your laptop keyboard is not just a neat trick. It is a practical step that protects your work and your device. Here are some real reasons why people lock their keyboards every day.
Preventing Accidental Keystrokes
When you close your laptop or set it down on a table, the keys can get pressed by accident. This is especially true for laptops with shallow key travel. A single accidental press can close your browser, delete a paragraph, or even shut down your computer. Locking the keyboard stops all of this from happening.
Keeping Kids and Pets Safe
If you have young children or pets at home, you know they love pressing buttons. A toddler tapping random keys can open programs, change settings, or even make online purchases. Locking the keyboard keeps your laptop safe from little hands and paws.
Improving Focus During Presentations
When you are presenting on a big screen, every accidental keypress can interrupt your flow. Locking the keyboard lets you focus on your audience instead of worrying about stray fingers hitting the wrong keys.
Easier Cleaning and Maintenance
Cleaning your laptop keyboard with compressed air or a damp cloth is much easier when the keys are locked. You do not have to worry about typing random letters while you work around the keys. It also keeps dust and crumbs from triggering unwanted inputs.
How to Lock Laptop Keyboard on Windows
Windows offers several built-in ways to lock your keyboard. You do not need any special software for most of these methods. Let us go through them one by one.
Method 1: Use the Keyboard Shortcut
The fastest way to lock your laptop keyboard on Windows is through a simple shortcut. Press the Windows key + L on your keyboard. This locks your entire screen, which also disables the keyboard input. When you come back, you just press Enter and type your password to get back in.
This method is great for quick breaks. However, it locks the whole screen, not just the keyboard. If you want to keep the screen visible but stop keyboard input, keep reading.
Method 2: Disable the Keyboard in Device Manager
If you want to disable just the keyboard without locking the screen, Device Manager is your best friend. Here is how to do it:
- Right-click the Start button and select Device Manager.
- Expand the Keyboards section.
- Right-click your laptop keyboard device.
- Select Disable device.
- Confirm the action when prompted.
Your laptop keyboard will stop working immediately. You can still use an external keyboard if you have one plugged in. To re-enable it, go back to Device Manager, right-click the disabled keyboard, and select Enable device.
Method 3: Use the On-Screen Keyboard Trick
Here is a clever trick that some people use. Open the On-Screen Keyboard from the Windows search bar. Then, go to your physical keyboard settings and disable the built-in keyboard. The on-screen keyboard takes over, so you can still type without using the physical keys. This is handy when your physical keyboard is acting up or you want to lock it temporarily.
How to Lock Laptop Keyboard on Mac
Mac users have a slightly different approach, but the process is just as simple. Apple does not have a dedicated “lock keyboard” button, but there are effective workarounds.
Using the Screen Lock Shortcut
On a Mac, press Control + Command + Q to lock your screen. This is the Mac equivalent of the Windows lock shortcut. Your keyboard input stops, and you need your password or Touch ID to get back in.
Using Accessibility Settings
For a more targeted approach, you can use macOS Accessibility features to control keyboard input. Go to System Preferences > Accessibility > Keyboard and explore the options there. You can set up slow keys, sticky keys, or toggle features that limit keyboard behavior.
Using Third-Party Mac Apps
Apps like Karabiner-Elements let you remap or disable specific keys on your Mac keyboard. This is a powerful option if you want fine-grained control over which keys work and which do not. It is free and open-source, making it a popular choice among Mac users.
BIOS and UEFI Level Keyboard Lock
For advanced users who want a hardware-level lock, the BIOS or UEFI settings offer a deeper solution. This method disables the keyboard at the firmware level, which means it works before Windows or macOS even starts.
Accessing BIOS Setup
Restart your laptop and press the BIOS key during startup. This is usually F2, F10, F12, or Del, depending on your laptop brand. Once you are in the BIOS menu, look for an option related to the internal keyboard. Some laptops call it “Internal Keyboard” or “Onboard Keyboard.” Set it to Disabled and save your changes.
Keep in mind that BIOS options vary by manufacturer. Not all laptops have this setting available. If you do not see it, do not worry. The software methods covered above will work just fine for most users.
When to Use BIOS-Level Locking
BIOS-level locking is useful in specific situations. For example, if you are sending your laptop for repair, you might want to disable the keyboard to prevent any accidental input during servicing. It is also helpful in kiosk or dedicated workstation setups where the keyboard should remain off at all times.
Using Third-Party Software to Lock Your Laptop Keyboard
If the built-in methods do not meet your needs, third-party software gives you more control and flexibility. These tools often come with extra features like scheduling, selective key disabling, and password protection.
Popular Keyboard Lock Software
Here are some reliable options you can try:
- KeyFreeze: A simple free tool that locks your keyboard and mouse with one click. Press a custom password to unlock it. It works on all Windows versions.
- Toddler Keys: A lightweight app designed to prevent accidental key presses. It is perfect for parents who want to protect their laptop from curious kids.
- Keyboard Locker: This app lets you lock specific keys or the entire keyboard. It runs in the system tray and is easy to access whenever you need it.
Tips for Choosing the Right Software
When picking a keyboard lock tool, look for these features. First, make sure it is compatible with your operating system. Second, check if it has a quick-lock shortcut so you can lock the keyboard fast. Third, read reviews to make sure the software is safe and does not contain malware. Stick to trusted websites and well-known developers.
Troubleshooting Common Keyboard Lock Issues
Sometimes things do not go as planned. Your keyboard might not lock properly, or it might not unlock afterward. Here are the most common issues and how to fix them.
Keyboard Does Not Respond After Locking
If your keyboard stops responding after you try to lock it, do not panic. First, check if you accidentally disabled it in Device Manager. Go to Device Manager, look under Keyboards, and make sure your keyboard is enabled. If it shows a yellow warning icon, right-click it and select Update Driver.
Keyboard Locks Automatically on Startup
If your keyboard keeps locking itself every time you start your laptop, something might be running in the background. Check your Startup programs in Task Manager. Disable any keyboard lock or automation tools that you do not recognize. You should also scan your laptop for malware, as some malicious software can disable your keyboard.
External Keyboard Works But Internal Does Not
This is a common issue after a driver update or system change. Go to Device Manager, find your internal keyboard under Keyboards, and uninstall the device. Restart your laptop, and Windows will reinstall the driver automatically. Your internal keyboard should work again.
If you are dealing with a situation where your laptop keyboard and mouse not working, you may want to check our detailed guide on that topic for additional troubleshooting steps. Similarly, if you are using an HP laptop and experiencing issues, our guide on mouse lock on HP laptop covers HP-specific solutions that may help.
Tips for Everyday Keyboard Locking Habits
Building a few simple habits can make keyboard locking part of your daily routine. Here are some practical tips to keep in mind.
- Use a keyboard cover: A silicone keyboard cover physically blocks the keys. It is a great complement to software locking methods.
- Set a shortcut reminder: Put a small sticky note near your laptop with your preferred lock shortcut. After a few days, it becomes second nature.
- Lock before cleaning: Always lock your keyboard before using any cleaning spray or compressed air. This prevents moisture from triggering key presses.
- Use an external keyboard: If you frequently lock your laptop keyboard, consider using an external keyboard for daily typing. This way, your built-in keyboard stays off and lasts longer.
- Check your power settings: Some laptops have settings that automatically disable the keyboard when an external keyboard is connected. Check your power and device settings to take advantage of this feature.
Comparison of Keyboard Lock Methods
| Method | Difficulty | Best For | Reversible |
|---|---|---|---|
| Windows Shortcut (Win + L) | Very Easy | Quick screen lock | Yes |
| Device Manager Disable | Easy | Disabling keyboard only | Yes |
| Mac Screen Lock (Ctrl+Cmd+Q) | Very Easy | Mac users | Yes |
| BIOS/UEFI Setting | Advanced | Hardware-level control | Yes |
| Third-Party Software | Easy | Custom control and scheduling | Yes |
Each method has its strengths. The Windows shortcut is the fastest and easiest for most users. Device Manager gives you more control. BIOS settings are the most thorough. Third-party software adds flexibility. Choose the method that fits your needs best.
If you are exploring options for using your laptop with an external setup, you might want to check out our article on wireless keyboard and mouse for laptop to find the best peripherals that pair well with your device. Also, if you want to understand how locking works alongside other peripherals, our guide on how to lock laptop mouse covers mouse locking in detail.
Final Thoughts
Locking your laptop keyboard is one of those small things that makes a big difference. It protects your work, keeps your device safe, and gives you control over when your keyboard is active. Whether you use a simple Windows shortcut, dive into Device Manager, or install third-party software, the method you choose should feel comfortable and easy to use.
The key is to make locking your keyboard a habit. Once it becomes second nature, you will wonder how you ever managed without it. Start with the method that feels easiest for you and build from there. Your laptop and your sanity will thank you.
Remember, every locking method can be reversed. You are never locked out forever. So go ahead, try these steps today, and enjoy the peace of mind that comes with knowing your laptop keyboard is exactly where you want it to be.
Frequently Asked Questions
Can I lock just specific keys on my laptop keyboard?
Yes, you can. Third-party software like KeyFreeze and Keyboard Locker allows you to disable specific keys while keeping others active. This is useful if you only want to block certain keys that cause the most accidental inputs, such as the spacebar or function keys.
Will locking my laptop keyboard affect an external keyboard I have plugged in?
No, it will not. When you disable your laptop keyboard through Device Manager or lock it via software, an external USB or Bluetooth keyboard continues to work normally. This makes it easy to use an external keyboard while keeping your built-in keyboard locked.
Is it safe to lock my laptop keyboard in BIOS settings?
Yes, it is completely safe. Disabling the internal keyboard in BIOS is a standard feature available on most laptops. It does not damage your hardware or void your warranty. You can always re-enable it by going back into BIOS and changing the setting back to enabled.
What should I do if my laptop keyboard will not unlock after I disabled it?
If your keyboard will not unlock, restart your laptop and enter Device Manager. Look for the keyboard under the Keyboards section. If it shows as disabled, right-click it and select Enable device. If you do not see it, click Action in the menu bar and select Scan for hardware changes. Your keyboard should reappear and work normally.
Do I need to install any software to lock my laptop keyboard?
No, you do not need any software for most methods. Windows and Mac both offer built-in ways to lock or disable the keyboard. However, if you want more advanced features like selective key locking or scheduling, third-party software is a great option. Free tools like KeyFreeze work without any installation hassle.
How do I lock my laptop keyboard when cleaning it?
The easiest way is to shut down your laptop completely before cleaning. If you want to clean it while it is on, press Win + L to lock the screen or disable the keyboard in Device Manager. This prevents any moisture or debris from triggering unwanted key presses while you clean between and around the keys.