How to Install Ram to Laptop
Upgrading your laptop’s RAM is one of the most effective ways to improve its speed and multitasking ability. This guide provides a complete, safe, and easy-to-follow walkthrough for installing new memory modules yourself. You’ll learn how to identify your laptop’s RAM type, prepare the necessary tools, execute the physical installation without damage, and verify the upgrade. With careful attention to compatibility and static safety, you can breathe new life into an older laptop or enhance a new one’s performance, all while saving significant money on professional service fees.
Key Takeaways
- Compatibility is King: Your new RAM must match your laptop’s supported type (DDR3, DDR4, DDR5), speed, and maximum capacity. Always check your laptop’s manual or use system tools first.
- Safety First: Always power down the laptop completely, unplug the charger, and remove the battery (if possible). Ground yourself to prevent static electricity damage to sensitive components.
- Tools Matter: You typically need only a small Phillips-head screwdriver and a plastic spudger or pry tool. Keep screws organized and avoid using metal tools near exposed circuitry.
- Gentle Handling: RAM modules are fragile. Handle them by the edges, avoid touching the gold contacts, and never force them into the slot. They should click into place with firm, even pressure.
- Verify After Installation: Boot your laptop and enter the BIOS/UEFI or check the operating system’s system information to confirm the new RAM is recognized and running at the correct speed.
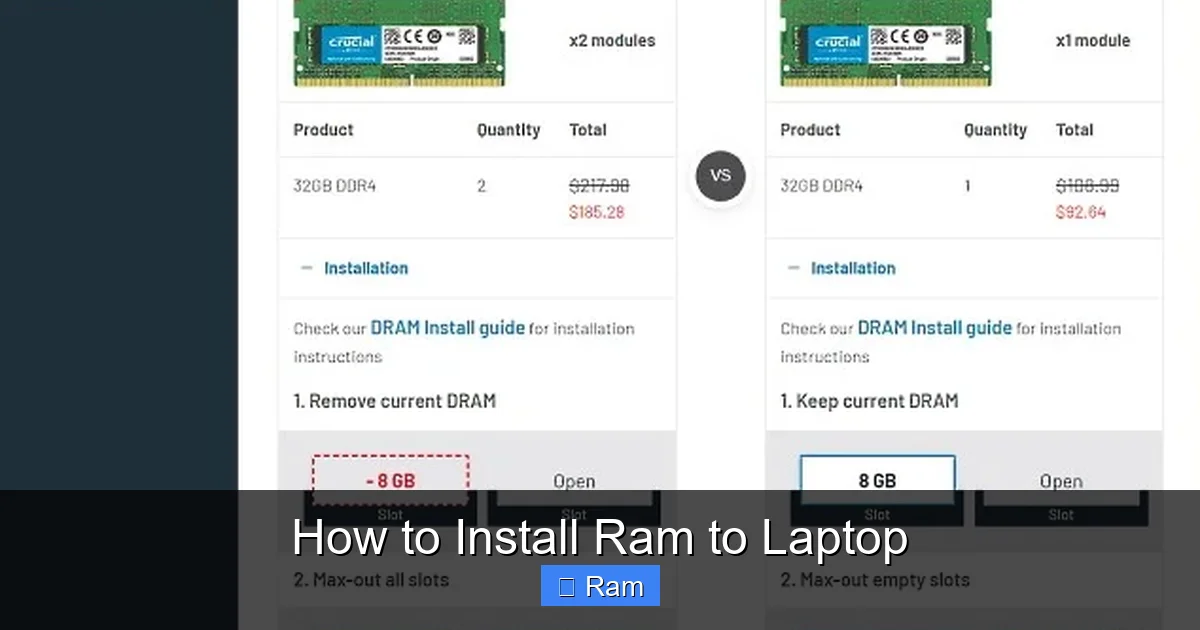
- One Module at a Time: If replacing old RAM, remove the existing modules first. If adding to an empty slot, you can install the new stick directly. For dual-channel performance, install matched pairs in the correct slots.
- Know When to Seek Help: If your laptop has a sealed chassis (like many modern ultrabooks), or if you encounter significant resistance, stop. Forcing it can cause irreversible damage.
📑 Table of Contents
- Why Upgrade Your Laptop’s RAM? Understanding the Impact
- Essential Pre-Installation Preparation: Knowledge and Tools
- Step-by-Step: Opening Your Laptop and Locating the RAM Bay
- The Core Process: Removing Old RAM and Installing New RAM
- Troubleshooting, Reassembly, and First Boot
- Advanced Considerations and When Not to DIY
Why Upgrade Your Laptop’s RAM? Understanding the Impact
Before we dive into the “how,” let’s talk about the “why.” Random Access Memory, or RAM, is your laptop’s short-term working memory. It’s where the CPU temporarily stores data it needs to access quickly for running your operating system, applications, and open files. Think of it like your desk surface: a larger desk (more RAM) lets you spread out multiple projects (programs and browser tabs) without constantly shuffling papers to the filing cabinet (the much slower hard drive or SSD). When your RAM fills up, your laptop starts “thrashing,” using the storage drive as virtual memory, which causes severe slowdowns, stuttering, and an overall frustrating experience.
The Tangible Benefits of More Memory
Installing additional or faster RAM delivers immediate, noticeable improvements. For the everyday user, this means you can keep dozens of web browser tabs open in Chrome or Firefox alongside a word processor, a music streaming app, and a video call without the system grinding to a halt. For content creators, it means smoother video editing timelines, faster rendering times, and the ability to work with large image files in Photoshop without constant lag. For casual gamers, it can eliminate stutters in games that are otherwise well-supported by your graphics card, especially in open-world titles that stream assets dynamically. The most common sign you need a RAM upgrade is when your system feels sluggish during normal multitasking, and your Task Manager (Windows) or Activity Monitor (macOS) shows RAM usage consistently above 80-85%.
Essential Pre-Installation Preparation: Knowledge and Tools
Jumping into the physical upgrade without preparation is the fastest route to a broken laptop or incompatible memory. This phase is all about research and gathering the right equipment. Rushing here can waste your money on the wrong RAM or lead to a costly mistake.
Visual guide about How to Install Ram to Laptop
Image source: guidingtech.com
Step 1: Identify Your Laptop’s Current RAM Configuration
You must know exactly what type of RAM your laptop supports and what slots are currently occupied. Don’t guess! Here’s how to find out:
- Windows: Press Ctrl + Shift + Esc to open Task Manager. Go to the “Performance” tab and click on “Memory.” Here you’ll see the type (e.g., DDR4), speed (e.g., 2666 MHz), and used/available slots (e.g., 2 of 2 slots used). For more detail, use a free tool like CPU-Z. Under the “Memory” and “SPD” tabs, you can see specifics for each slot.
- macOS: Click the Apple menu > About This Mac > Memory. It will list the memory type and configuration.
- Physical Inspection (if comfortable): If you plan to open the laptop anyway, you can often see the type printed on the RAM stick itself (e.g., “DDR4-2666”).
Step 2: Research and Purchase the Correct RAM
Armed with your laptop’s model number (usually on a sticker on the bottom) and RAM specs, you can buy the right upgrade. Key factors are:
- Type: DDR3, DDR4, DDR5. These are not physically or electrically compatible. You must match what your laptop supports.
- Speed (MHz): RAM has a rated speed (e.g., 3200MHz). Your laptop will run all installed RAM at the speed of the slowest module. It’s best to match speeds, but mixing a faster and slower stick will work, just at the lower speed.
- Capacity: Check your laptop’s maximum supported RAM (e.g., 32GB, 64GB) in its manual or on the manufacturer’s support site. A 4GB or 8GB stick is common for a single upgrade.
- Form Factor: Almost all laptops use SODIMM (Small Outline DIMM) modules, which are shorter than desktop RAM. Ensure you’re not buying standard DIMMs.
Pro Tip: Buying a kit from a reputable brand (Crucial, Kingston, Corsair, G.Skill) that offers a compatibility guarantee for your specific laptop model is the safest, most hassle-free route. They use pre-validated modules.
Step 3: Gather Your Tools and Prepare Your Workspace
You need very few tools, but the right ones matter.
- A small Phillips-head screwdriver (#0 or #1). This is for removing the bottom case screws.
- A plastic spudger, guitar pick, or old credit card. For prying open plastic clips without scratching.
- A microfiber cloth. To place screws on and clean surfaces.
- An anti-static wrist strap (highly recommended). If you don’t have one, you can discharge static by regularly touching an unpainted metal part of the laptop’s chassis (like a port rim) while working.
Prepare a clean, flat, well-lit workspace with a soft cloth or mat to lay the laptop on. Good lighting is non-negotiable for seeing tiny screws and connectors.
Step-by-Step: Opening Your Laptop and Locating the RAM Bay
Now, the physical work begins. Every laptop is different, but the general principles are the same. The goal is to remove the bottom cover to access the internal components.
Visual guide about How to Install Ram to Laptop
Image source: codinglap.com
Power Down and Unplug Completely
Shut down your laptop through the operating system. Do not just sleep or hibernate it. Then, unplug the AC adapter. If your laptop has a removable battery, take it out now. This is a critical safety step to prevent any power from reaching the motherboard during your work.
Removing the Bottom Cover
Flip the laptop over. You’ll see a series of screws around the perimeter of the bottom plate. Important: Before removing any screws, note their locations and lengths. Some screws are different lengths, and installing a long screw in the wrong hole can damage the motherboard. A trick is to lay them out on a piece of paper in the same pattern as they appear on the laptop.
Gently unscrew all the screws. Some laptops also have hidden screws under rubber feet or warranty seals. If you feel resistance, stop and look for these. Once all screws are out, use your plastic tool to gently pry around the seam of the bottom cover. Start at a corner and work your way around. The clips are plastic and can break if forced. You should hear a series of soft clicks as they disengage. Be patient. If a section is stuck, re-check for a missed screw.
Locating the RAM Modules
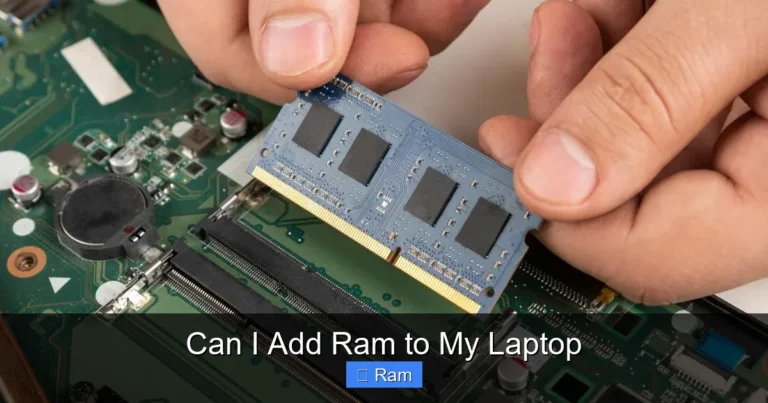
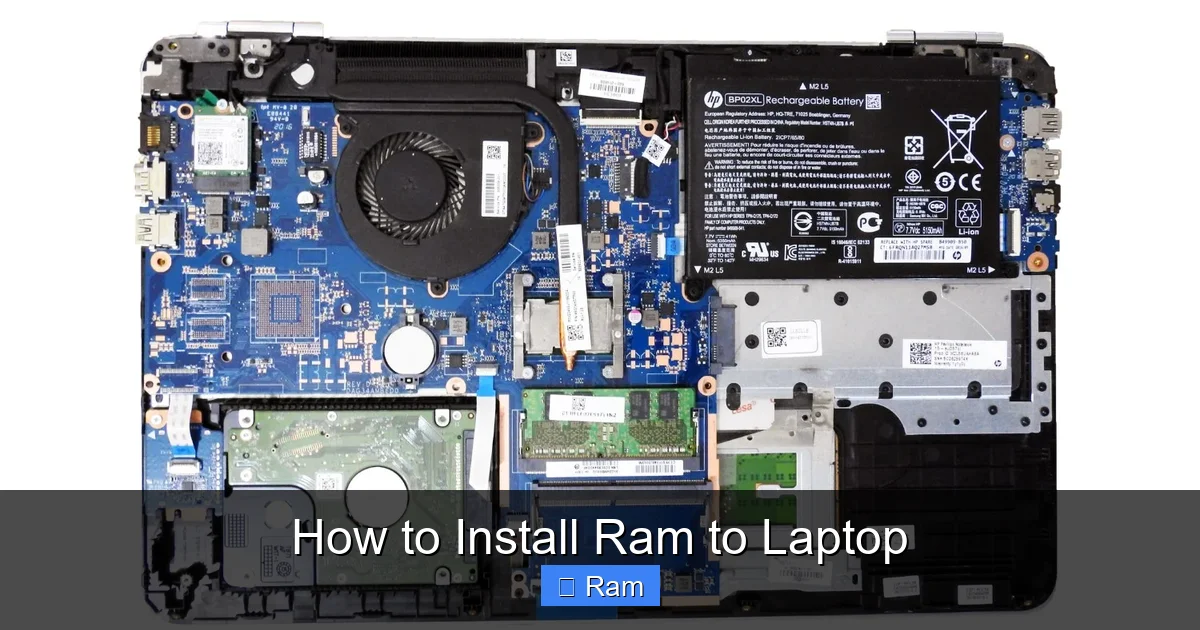
With the bottom cover off, you’ll see the motherboard and various components. The RAM is almost always located near the center or a corner, under a small metal shield or in plain view. It looks like two (or more) small circuit boards with a notch in the middle and a series of gold contacts, held down by small metal clips on either side. They are typically the most accessible upgrade component inside a laptop.
The Core Process: Removing Old RAM and Installing New RAM
This is the moment of truth. The process for removal and installation is essentially the reverse of each other. Take your time here.
Visual guide about How to Install Ram to Laptop
Image source: robots.net
How to Safely Remove Existing RAM Modules
If you are replacing old RAM, you must first remove the existing sticks. Look at the sides of the RAM module where it’s clipped into the slot. You’ll see two small, white or black plastic retention clips on either side.
- Push the clips outward. Use your fingertips or a plastic tool to gently push both clips away from the center of the module, simultaneously. They will pivot outward. This action physically ejects the module by raising the edge slightly.
- Tilt and remove. Once the clips are fully open, the top edge of the RAM will pop up at about a 30-45 degree angle. Gently grasp the module by its edges and pull it straight out. Do not wiggle it side-to-side. It should come out smoothly.
- Repeat for all modules. If you have two sticks, remove them one at a time. If you are keeping one stick and adding another, only remove the one(s) from the slot(s) you want to fill.
Place the old RAM on your microfiber cloth, contacts facing up. If you plan to keep it as a spare, store it in an anti-static bag.
Installing Your New RAM Module
Installation is the reverse process and must be done precisely.
- Align the notch. Pick up your new RAM module by the edges. Notice the off-center notch on the bottom edge (the gold contacts). Align this notch with the corresponding key in the RAM slot. The module is not symmetric; it only fits one way. Do not force it.
- Insert at an angle. Hold the module at the same ~30-45 degree angle you removed the old one at. Line up the contacts with the slot and gently but firmly press the module straight down into the slot. The gold contacts should disappear fully into the slot.
- Seat the module. You will feel slight resistance, then a definitive click. The key is to press down on the top edge of the module until the two retention clips on the sides snap back into place, locking the module flat against the motherboard. You must apply even pressure along the top edge. You should hear/feel two distinct clicks—one for each clip.
- Verify. Visually confirm that the clips are fully engaged and the module is sitting perfectly parallel to the motherboard. There should be no gap.
Critical: If your laptop has two slots and you are installing two new sticks, install them in the correct slots for dual-channel performance. The motherboard manual or silkscreen printing near the slots will indicate the preferred order (often Slot A and Slot B, or DIMM1 and DIMM2). If adding one stick to a laptop with one stick already, consult the manual; sometimes the empty slot must be populated first.
Troubleshooting, Reassembly, and First Boot
With the RAM installed, it’s time to close up and test. But what if it doesn’t work? Let’s cover common pitfalls and the correct reassembly procedure.
Common Installation Issues and Fixes
- Laptop won’t power on / beeps / shows a black screen: This is the most common symptom of improperly seated RAM. Power down immediately. Reopen the case, remove the module, and reinstall it, pressing much more firmly and evenly until the clips are fully locked. Ensure it’s in the correct slot and properly aligned.
- RAM is not detected in the OS: The module may be seated but not making full contact. Re-seat it as above. Also, enter the BIOS/UEFI during boot (usually by pressing F2, F10, Del, or Esc) and check if the BIOS sees the full capacity. If the BIOS sees it but the OS doesn’t, there may be a software issue.
- System is unstable (crashes, blue screens): This can indicate incompatible RAM or a faulty stick. If you have two new sticks, try booting with only one installed at a time to identify a bad module. Ensure the RAM voltage and timings are compatible. Sometimes enabling an XMP profile in BIOS is needed for higher speeds.
Reassembling Your Laptop
Before closing the case, do a final visual check. Ensure no tools or loose screws are left inside. Reconnect any internal cables you may have disconnected (rare for a RAM upgrade, but possible on some models). Align the bottom cover and press it gently around the edges to reseat all the plastic clips. Start by pressing around the perimeter. You should hear the clips click back into place all around. Finally, reinsert all the screws in their correct holes, using the length pattern you noted earlier. Do not overtighten, especially in plastic areas—snug is sufficient.
The First Power-On and Verification
Plug in the AC adapter (do not insert the battery yet if you removed it) and power on the laptop. It may perform a memory check and reboot once—this is normal. Once you reach the desktop:
- On Windows, press Ctrl+Shift+Esc to open Task Manager, go to the “Performance” tab, and click “Memory.” The top-right will show the total installed RAM (e.g., “16.0 GB”). It should match your new total.
- On macOS, go to Apple Menu > About This Mac > Memory. It will show the new configuration.
- For advanced verification, you can use a tool like CPU-Z again. Under the “Memory” and “SPD” tabs, you can see the type, size, and speed of each individual module to confirm they are running as expected.
If the system boots and shows the correct RAM, shut down, reinsert the battery (if applicable), and you’re done! Enjoy your faster, more responsive laptop.
Advanced Considerations and When Not to DIY
While a RAM upgrade is one of the simpler internal upgrades, there are scenarios where caution or professional help is warranted.
Understanding Dual-Channel and不对称 Configurations
For optimal performance, many laptops use a dual-channel memory architecture. This means data can be transferred between the RAM and CPU twice as fast if matched pairs of RAM are installed in specific slots. For the best results, if you have two slots, install two identical sticks (same brand, model, size, speed). If you have one slot occupied and add a different stick, the system will run in asymmetric flex mode, which is still faster than single-channel but not as optimal as true dual-channel. For general use, this difference is often negligible, but for integrated graphics performance or intensive memory bandwidth tasks, matched pairs are preferable.
Soldered RAM: The Modern Limitation
This is the most critical modern consideration. Many ultra-thin laptops, especially from Apple (all MacBooks since 2012-ish), Microsoft (Surface Laptop), and numerous Windows ultrabooks, have RAM that is soldered directly onto the motherboard. This means it is not upgradeable by the user. If your laptop has one or two SO-DIMM slots accessible under the bottom cover, you can upgrade. If you open the case and see no slots, or see RAM chips soldered flat to the board with no slots, your upgrade path is over. Always confirm your specific model has user-accessible slots before purchasing RAM.
When to Walk Away and Call a Professional
Know your limits. Stop and seek professional help if:
- Your laptop has a sealed chassis with no obvious user-serviceable screws (glued bottom, proprietary screws).
- You encounter hidden screws under warranty seals. Breaking a seal may void your warranty.
- You need to disconnect numerous complex internal cables or components just to reach the RAM bay. This indicates a very difficult disassembly.
- You feel significant, unexplained resistance when prying the case or inserting the RAM. Forcing it will break plastic clips or bend the motherboard.
- The laptop is still under warranty. Opening it may void the warranty. Check the terms first.
For these complex or sealed systems, your only upgrade path may be external solutions like a fast external SSD for storage or cloud-based workflows, or saving for a new, more upgradeable laptop.
Frequently Asked Questions
Can I mix RAM brands and speeds in my laptop?
You can physically mix RAM brands and speeds, but it’s not ideal. The system will run all modules at the speed of the slowest stick. For best stability and performance, especially in dual-channel mode, use identical modules from the same kit. Mixing can sometimes cause boot issues or instability, though it often works fine for basic tasks.
How do I know if my laptop RAM is upgradeable?
First, find your laptop’s exact model number (on a sticker on the bottom). Search online for “[Your Laptop Model] RAM upgrade guide” or “[Your Laptop Model] service manual.” The manual will show an exploded view. You can also physically check by removing the bottom cover—if you see one or two SO-DIMM slots with clips, it’s upgradeable. If you see no slots and only chips soldered to the board, it is not.
Is static electricity really a danger when installing RAM?
Yes, absolutely. Static discharges as low as 100 volts (you often can’t feel it) can damage the microscopic circuits on a RAM module or motherboard. Always ground yourself by touching an unpainted metal part of the laptop’s chassis before touching components, or use an anti-static wrist strap clipped to a grounded object. Handle RAM only by the edges.
My laptop has only one RAM slot. Should I replace my 4GB stick with an 8GB one, or add a 4GB to the empty slot?
Since there’s only one slot, you must replace the existing module. You cannot add a second one. Remove the old 4GB stick and install the new, larger capacity stick (e.g., 8GB, 16GB). Ensure the new RAM is compatible with your laptop’s specifications.
What should I do if my laptop doesn’t boot after installing new RAM?
First, don’t panic. Power it down immediately. Open the case again and re-seat the RAM modules, pressing much more firmly until the retention clips click securely. Ensure they are in the correct slots. Try booting with only one new stick installed (if you have two) to isolate a potentially faulty module. If it still fails, the new RAM may be incompatible or defective. Test it in another laptop if possible, or contact the seller.
Will more RAM always make my laptop faster?
Not always. More RAM primarily helps when your previous RAM was full, causing the system to use slow storage as “virtual memory.” If you were only using 4GB out of 8GB, upgrading to 16GB will have minimal perceptible effect. Use Task Manager to check your “Hardware Reserved” and “In Use” memory during your typical workload. If usage is consistently above 85%, an upgrade will significantly improve responsiveness. Also, ensure your CPU and storage (SSD) aren’t the primary bottlenecks.