How to Install M 2 Nvme Ssd in Laptop
Installing an M 2 NVMe SSD in your laptop is one of the best upgrades you can make. It boosts speed, improves boot times, and gives your old laptop new life. This guide walks you through every step from choosing the right drive to formatting it. You do not need to be a tech expert to get it done.
If your laptop feels slow, one of the best things you can do is upgrade its storage. An M 2 NVMe SSD can make your laptop feel brand new. Programs launch in seconds, files copy fast, and everything just runs smoother. This guide will show you exactly how to install M 2 NVMe SSD in laptop step by step.
You do not need expensive tools or advanced tech skills. With a small screwdriver and this guide, you can finish the job in under 30 minutes. Whether you are replacing an old hard drive or adding a second drive, we have you covered. Let us get started.
Key Takeaways
- M 2 NVMe SSDs are much faster than traditional hard drives and can transform your laptop experience.
- You need to check compatibility first, including your laptop’s M 2 slot type and supported NVMe protocol.
- The installation process is straightforward and takes about 15 to 30 minutes with basic tools.
- Cloning your old drive or doing a fresh Windows install are both viable setup options after hardware installation.
- Applying a thermal pad and securing the SSD properly prevents overheating and ensures long-term reliability.
- Upgrading your storage alongside RAM can give your laptop a massive performance boost.
📑 Table of Contents
What Is an M 2 NVMe SSD and Why Install One?
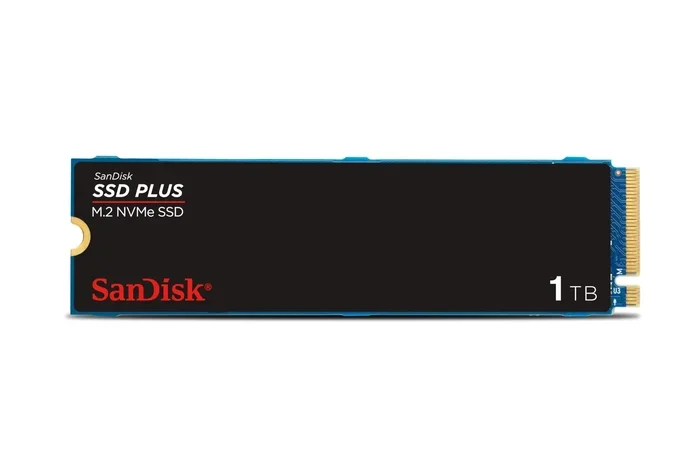
An M 2 NVMe SSD is a small, flat storage drive that plugs directly into your laptop’s motherboard. The M 2 form factor looks like a stick of gum. NVMe stands for Non-Volatile Memory Express, which is a fast protocol that lets the drive communicate with your system at incredible speeds.
Compared to a traditional hard drive or even a SATA SSD, an NVMe M 2 drive is dramatically faster. You can expect read speeds of 3,000 MB/s or more on modern drives. This means your laptop boots up in seconds instead of minutes.
Here are some key reasons to upgrade:
- Blazing fast speeds for loading games, apps, and large files.
- No moving parts, which means better durability and less noise.
- Compact size that fits perfectly inside slim laptops.
- Lower power consumption, which can improve battery life slightly.
If you have ever thought about upgrading your laptop storage, now is the perfect time. An M 2 NVMe SSD is the single most impactful upgrade for a sluggish laptop.
Check Compatibility Before You Buy
Not every laptop supports M 2 NVMe SSDs. Before you spend money, you need to confirm a few things. This step saves you from buying the wrong drive.
Find Your Laptop’s M 2 Slot Type
Laptops use different M 2 slot sizes. The most common is M 2 2280, which is 22mm wide and 80mm long. Some smaller laptops use M 2 2230 or M 2 2242 drives. Check your laptop’s manual or look up your model online to find which sizes are supported.
You also need to know what kind of M 2 slot your laptop has. Some slots support only SATA M 2 drives, while others support NVMe. A few slots support both. Look up your laptop model to confirm it has an NVMe-capable slot.
Check If Your Laptop Has a Free Slot
Some laptops come with one M 2 slot already occupied by the factory drive. If your laptop has a second free slot, you can add a new drive without removing the old one. If there is only one slot, you will need to replace the existing drive.
You can find this information by checking your laptop specs online or opening the back panel carefully. If you are unsure, searching for your laptop model plus “M 2 slot” usually gives quick answers.
What You Need Before Starting
Gather everything before you begin. Having all your tools ready makes the process smooth and stress-free.
- M 2 NVMe SSD — Make sure it matches your slot size and type.
- Small Phillips head screwdriver — Usually size PH1 or PH2.
- Thermal pad — Many laptops need this for the SSD. Check if yours includes one.
- Anti-static wrist strap — Optional but recommended to protect your components.
- A clean, flat workspace — A table with good lighting works best.
- A USB drive (8GB or more) — Only if you plan to do a fresh Windows install.
Pro tip: If you are also planning to upgrade your RAM, consider doing both at the same time. It saves you from disassembling your laptop twice. You can learn more about how to install RAM in laptop in our separate guide.
Step-by-Step Installation Guide
Now for the fun part. Follow these steps carefully and you will have your new drive installed in no time.
Step 1: Back Up Your Data
Before you open your laptop, back up everything important. You can use an external hard drive, cloud storage, or a USB flash drive. If you are replacing your main drive, you will lose everything on it if you do not clone it first.
Step 2: Power Off and Unplug Your Laptop
Shut down your laptop completely. Unplug the power cable and remove the battery if it is removable. If the battery is built-in, just make sure the laptop is fully powered off. This protects you and your components from electrical damage.
Step 3: Open the Laptop Back Panel
Flip your laptop over and locate the screws on the back panel. Use your screwdriver to remove them. Keep the screws in a small container so you do not lose them. Gently pry off the back panel using a plastic spudger or your fingernail.
Be careful not to force anything. If a panel feels stuck, double-check that you have removed all the screws first.
Step 4: Locate the M 2 Slot
Once the back panel is off, look for the M 2 slot on the motherboard. It is usually a small horizontal slot with a tiny screw holding the existing drive in place. The M 2 connector has a small notch that matches the key on your drive.
If you are adding a second drive, look for a second M 2 slot. Not all laptops have one, so check before assuming.
Step 5: Remove the Old Drive (If Replacing)
If you are replacing an existing M 2 drive, loosen the small screw that holds it in place. The drive will angle up slightly at one end. Gently pull it out at a slight angle. Do not force it. Set the old drive aside safely.
If you are adding a second drive, you can skip this step entirely.
Step 6: Install the New M 2 NVMe SSD
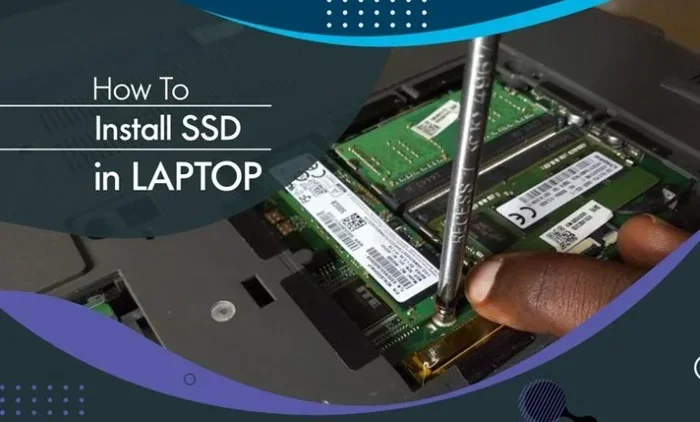
Take your new M 2 NVMe SSD out of its anti-static packaging. Hold it by the edges and avoid touching the gold connectors. Align the notch on the drive with the key in the M 2 slot.
Insert the drive at a 30-degree angle and gently push it down until it sits flat. Use the small screw to secure the drive to the motherboard. Do not overtighten the screw. A light snug is all it needs.
If your laptop uses a thermal pad, place it on top of the new SSD before securing it. The thermal pad helps dissipate heat and keeps the drive running cool.
Step 7: Reassemble Your Laptop
Put the back panel back on and press it firmly until it clicks into place. Replace all the screws and tighten them gently. Do not strip the screws by using too much force.
Reinsert the battery if you removed it. Plug in your power cable.
Set Up and Configure Your New SSD
Now that the hardware is installed, you need to set up the drive so you can actually use it. There are two main paths here.
Option A: Clone Your Old Drive
If you replaced your main drive and want to keep everything as it was, cloning is the way to go. You need a USB-to-SATA adapter or an external enclosure to connect your old drive to your laptop.
Use cloning software like Macrium Reflect, Clonezilla, or your laptop manufacturer’s built-in cloning tool. The clone copies everything — your operating system, programs, and files — to the new drive. After cloning, you just swap the drives and boot up.
Option B: Do a Fresh Windows Installation
A fresh install gives you a clean start. Create a Windows installation USB using the Microsoft Media Creation Tool on another computer. Boot from the USB, follow the on-screen prompts, and select your new M 2 NVMe SSD as the installation target.
A fresh install often runs faster and cleaner than a cloned setup. You just need to reinstall your programs and copy your files back over.
Initialize and Format the Drive
After installation, you may need to initialize the new drive. Right-click the Start button and select Disk Management. If the drive is not initialized, Windows will prompt you to do so. Choose GPT for modern systems. Then format the drive as NTFS and assign it a drive letter.
Your new M 2 NVMe SSD is now ready to use. You should notice a huge difference in speed right away.
Common Mistakes to Avoid
Even with a simple process like this, mistakes can happen. Here are some to watch out for:
- Forgetting to back up data — This is the number one mistake. Always back up before opening your laptop.
- Buying the wrong drive size — Double-check that your laptop supports the length and type of M 2 drive you buy.
- Overtightening the screw — The M 2 screw only needs to be snug. Tightening too much can damage the motherboard.
- Skipping the thermal pad — Some laptops require a thermal pad for the SSD. Without it, the drive can overheat and slow down.
- Not updating BIOS — After installing a new NVMe drive, check if a BIOS update is available. This ensures full compatibility and performance.
Expert Tips for the Best Performance
Want to get the most out of your new M 2 NVMe SSD? Follow these tips:
- Enable PCIe Gen 3 or Gen 4 in BIOS if your laptop supports it. This unlocks the full speed of your drive.
- Keep at least 10 to 15 percent of the drive free. SSDs perform best when they have free space for wear leveling.
- Avoid filling the drive completely. A nearly full SSD slows down significantly.
- Update your SSD firmware from the manufacturer’s website. This can improve stability and performance.
- Consider upgrading your RAM too. More RAM paired with a fast NVMe SSD makes a laptop feel incredibly responsive. Check out our guide on how to upgrade RAM in a laptop for help.
Taking care of your new drive pays off in the long run. A well-maintained NVMe SSD can last for many years without any issues.
How Does an M 2 NVMe SSD Compare to Other Drives?
Not sure if an M 2 NVMe SSD is worth it? Here is a quick comparison:
| Feature | HDD | SATA SSD | M 2 NVMe SSD |
|---|---|---|---|
| Read Speed | 100-150 MB/s | 500-550 MB/s | 3,000-7,000 MB/s |
| Boot Time | 60-90 seconds | 15-25 seconds | 5-10 seconds |
| Price per GB | $0.03-$0.05 | $0.06-$0.10 | $0.08-$0.15 |
| Durability | Low (moving parts) | High | High |
| Power Use | High | Medium | Low |
The numbers speak for themselves. An M 2 NVMe SSD is the clear winner for speed and overall performance. The price difference has shrunk a lot in recent years too, making it an easy choice.
Conclusion
Installing an M 2 NVMe SSD in your laptop is one of the easiest and most rewarding upgrades you can do. It costs less than you might think and delivers a noticeable improvement every time you use your laptop. From faster boot times to quicker file transfers, the benefits are immediate and real.
Follow the steps in this guide carefully, take your time, and you will be up and running in no time. Remember to back up your data first, check compatibility, and handle all components gently. If you run into any issues, feel free to revisit this guide or search for your specific laptop model online.
Your laptop has been waiting for this upgrade. Go ahead and give it the speed boost it deserves.
Frequently Asked Questions
Can I install an M 2 NVMe SSD in any laptop?
No, not all laptops have an M 2 slot. You need to check your laptop’s specifications first to confirm it supports NVMe M 2 drives. Some older laptops only have SATA M 2 slots or no M 2 slot at all.
Do I need to install drivers for my M 2 NVMe SSD?
Usually no. Windows 10 and Windows 11 include native drivers for most NVMe SSDs. However, you should check the manufacturer’s website for any firmware or driver updates that could improve performance and stability.
Can I use my laptop while the M 2 SSD is installed but not formatted?
You can use the laptop, but the new drive will not be accessible until you initialize and format it through Disk Management. Make sure to back up any important data before starting the process.
How long does it take to install an M 2 NVMe SSD?
The actual installation takes about 10 to 15 minutes. If you are also cloning your old drive or doing a fresh Windows install, add another 30 to 60 minutes depending on your data size and internet speed.
Is it better to clone or do a fresh install of Windows on the new SSD?
Cloning saves time and keeps everything exactly as it was. A fresh install gives you a clean system that may run faster. Choose cloning if you want a seamless transition. Choose a fresh install if you want a clean slate.
Will upgrading to an M 2 NVMe SSD improve gaming performance?
Yes, it can. Games load faster, levels stream in more quickly, and open-world games benefit the most. However, the GPU and RAM still have the biggest impact on frame rates. An NVMe SSD improves load times more than raw gameplay performance.