How to Install a Second Nvme M 2 Ssd

Adding a second NVMe M 2 SSD to your PC is simpler than you think. This guide walks you through every step, from checking compatibility to configuring the drive in Windows. You will learn the tools you need, the installation process, and how to optimize your new M 2 NVMe storage for peak performance.
So you want to add a second NVMe M 2 SSD to your computer. Maybe your current drive is running out of space, or you want faster load times for your games and projects. Whatever the reason, installing a second M 2 NVMe drive is one of the easiest upgrades you can do at home.
This guide covers everything from picking the right drive to getting it up and running in Windows. You do not need to be a tech expert. If you can use a screwdriver, you can handle this. Let us get started.
An M 2 NVMe SSD connects directly to your motherboard through a small slot. It uses the PCIe interface, which means blazing fast speeds. Adding a second one gives you more storage without sacrificing performance. Below, we break down each step in simple, clear language.
Key Takeaways
- Check compatibility first: Make sure your motherboard has a free M 2 slot and supports NVMe PCIe drives.
- You only need basic tools: A Phillips screwdriver and a few minutes of your time are all you need.
- Windows setup is straightforward: Initialize and format the new drive through Disk Management in just a few clicks.
- Driver updates matter: Keeping your NVMe drivers current ensures the best speed and stability.
- Avoid common mistakes: Do not overtighten the screw, and always ground yourself before handling the SSD.
- Heat management is key: Consider a heatsink or proper airflow to keep your M 2 SSD running cool.
📑 Table of Contents
What Is an NVMe M 2 SSD and Why Add a Second One?
Understanding NVMe Technology
NVMe stands for Non-Volatile Memory Express. It is a protocol designed specifically for flash storage. Unlike older SATA drives, an M 2 PCIe NVMe SSD sends data directly through the PCIe bus. This removes bottlenecks and delivers much faster read and write speeds.
A typical SATA SSD tops out around 550 MB per second. A modern NVMe drive can hit 3,500 MB per second or more. That is a huge difference. When you add a second NVMe M 2 SSD, you get all of that speed on an extra drive.
Benefits of a Second NVMe SSD
There are many reasons to install a second M 2 NVMe drive. Here are some of the best ones:
- More storage space: Keep your games, videos, and projects on a dedicated drive.
- Better organization: Separate your operating system from your data for a cleaner setup.
- Faster workflows: Video editors and designers benefit greatly from dual NVMe drives.
- Easy upgrades: You can add a larger drive later without replacing your existing one.
- No speed loss: NVMe drives work independently, so adding a second one does not slow down your first drive.
If you are looking for a great option, the Crucial T705 NVMe M.2 SSD is a popular choice for upgrades. It offers excellent speeds and solid value.
What You Need Before Installing
Checking Compatibility
Before you buy or install anything, check your motherboard. Not all PCs have multiple M 2 slots. Some older boards only have one. Here is how to find out:
- Look up your motherboard model online.
- Check the spec sheet for M 2 slot count.
- Verify that the slot supports NVMe PCIe drives.
- Check the M 2 key type (usually M key for NVMe).
Most modern motherboards from brands like ASUS, MSI, and Gigabyte support at least two M 2 slots. If your board has only one, you may need an M 2 SSD adapter that fits into a PCIe slot instead.
Tools and Materials
You do not need much to install a second NVMe M 2 SSD. Here is your checklist:
- A Phillips head screwdriver
- Your new NVMe M 2 SSD
- An anti-static wrist strap (optional but recommended)
- A clean, well-lit workspace
- Your PC manual (helpful but not required)
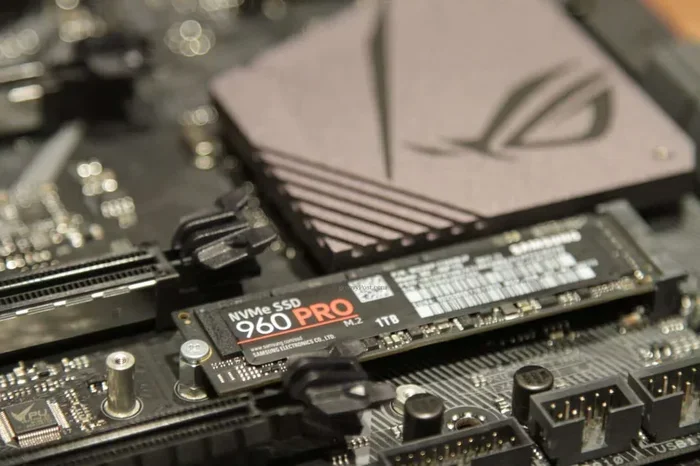
That is it. No special tools or software needed for the physical installation. The 1TB NVMe M.2 SSD is a common size that fits most needs and budgets.
Step-by-Step Installation Guide
Preparing Your PC
Safety comes first. Before you open your PC case, follow these steps:
- Shut down your computer completely.
- Unplug the power cord from the back of the PC.
- Press the power button for a few seconds to drain any remaining electricity.
- Place your PC on a flat, stable surface.
- Ground yourself by touching a metal part of the case or wearing an anti-static wrist strap.
These steps protect your components from static damage. Static electricity can harm sensitive electronics like your new NVMe drive. Do not skip this part.
Installing the SSD
Now it is time to install the drive. Follow these steps carefully:
- Locate the M 2 slot on your motherboard. It looks like a small horizontal slot with a screw hole at one end.
- Remove the M 2 retention screw from the slot.
- Hold the SSD at a 30-degree angle and align the gold contacts with the slot.
- Gently push the drive down until it lies flat against the motherboard.
- Secure the drive with the retention screw. Do not overtighten.
The drive should feel snug but not forced. If you meet resistance, stop and check the alignment. A misaligned drive will not work properly.
Securing the Drive
Some M 2 slots have a heatsink cover. If your motherboard includes one, you can place it over the drive after installation. This helps with heat dissipation, especially if you are using a high-performance M 2 NVMe SSD.
Once the drive is secured, close up your PC case. Reconnect the power cord. You are now ready to set up the drive in Windows.
Configuring the New SSD in Windows
Initializing the Drive
When you first boot up after installing a new drive, Windows may not show it right away. That is normal. You need to initialize it first:
- Right-click the Start button and select Disk Management.
- You will see a prompt to initialize the new disk. Click OK.
- Choose GPT (GUID Partition Table) and click OK.
- You will see the new drive listed as Unallocated.
GPT is the modern partition style. It supports drives larger than 2TB and works best with NVMe storage. If you see a popup asking to format, you can skip that for now.
Setting Up Storage
Now you need to create a partition and format the drive:
- Right-click the Unallocated space on the new drive.
- Select New Simple Volume.
- Follow the wizard and assign a drive letter.
- Choose NTFS as the file system.
- Give the volume a name and click Finish.
Your new M 2 NVMe drive is now ready to use. You can store files, install programs, or move games to it. To check the drive speed, you can use tools like CrystalDiskMark or the built-in Windows Performance Monitor.
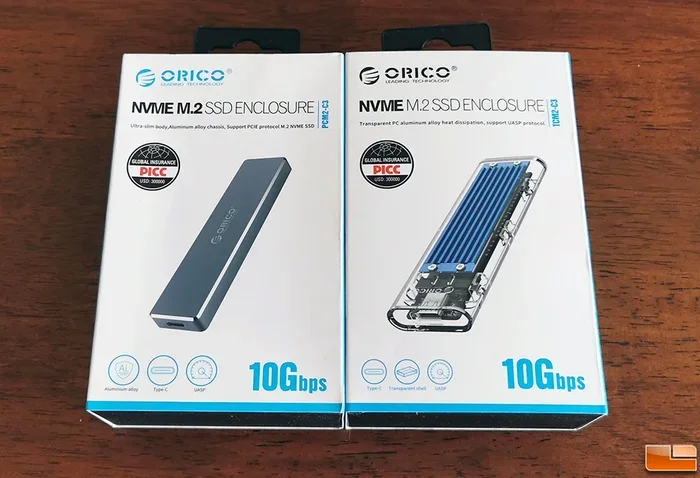
Once you are done, you might want to explore options for protecting or transporting your setup. An NVMe M.2 SSD enclosure is a great accessory if you ever need to remove or carry the drive.
Optimizing Your New NVMe M 2 SSD
Updating NVMe Drivers
Keeping your drivers up to date is important for performance and stability. Here is how to update your NVMe driver:
- Open Device Manager by right-clicking the Start button.
- Expand the Storage Controllers section.
- Right-click your NVMe controller and select Update Driver.
- Choose Search automatically for drivers.
You can also visit your motherboard manufacturer’s website and download the latest NVMe driver directly. This ensures you get the most optimized version for your specific board.
Enabling Heat Management
NVMe drives can generate heat, especially under heavy workloads. Over time, excessive heat can slow down your drive. Here are a few tips to keep things cool:
- Make sure your PC case has good airflow.
- Use the motherboard heatsink if one is included.
- Avoid placing the drive near other hot components.
- Consider adding a small case fan near the M 2 slot area.
If you are running a high-performance drive like the M 2 PCIe NVMe SSD in a tight enclosure, heat management becomes even more important. A little attention to airflow can go a long way.
Enabling XMP and BIOS Settings
Some motherboards have BIOS settings that can affect M 2 SSD performance. After installation, boot into your BIOS and check the following:
- Make sure the M 2 slot is enabled.
- Verify the PCIe generation setting matches your drive (Gen 3 or Gen 4).
- Ensure the boot priority is set correctly if you plan to use the new drive as a boot drive.
These settings are usually found under Advanced or Storage Configuration in your BIOS menu. Refer to your motherboard manual for exact instructions.
Common Mistakes to Avoid
Even with a simple installation, mistakes can happen. Here are some common ones to watch out for:
- Overtightening the screw: This can damage the M 2 slot or crack the drive. Tighten until snug, then stop.
- Forcing the drive: If the SSD does not slide in easily, check the angle and alignment. It should go in smoothly.
- Skipping the initialization step: A new drive will not appear in File Explorer until you initialize and format it in Disk Management.
- Using the wrong partition style: Always choose GPT for modern NVMe drives. MBR is outdated and limits your storage capacity.
- Ignoring driver updates: Outdated NVMe drivers can cause slow speeds or connectivity issues.
Avoiding these simple mistakes will save you time and frustration. Take your time, follow the steps, and you will be fine.
Final Thoughts
Installing a second NVMe M 2 SSD is a rewarding upgrade that gives you more speed and storage. Whether you are a gamer, a content creator, or just someone who needs more room on their PC, this upgrade makes a real difference.
The process is straightforward. You check compatibility, install the drive, configure it in Windows, and optimize your settings. Within about 30 minutes, you can have a brand new M 2 NVMe drive up and running.
Remember to handle the drive carefully, keep your drivers updated, and manage heat properly. These small steps will keep your second NVMe M 2 SSD performing at its best for years to come.
Now that you know how easy this upgrade is, there is no reason to wait. Grab your new drive, follow the steps in this guide, and enjoy the speed boost that comes with dual NVMe storage.
Frequently Asked Questions
Can I install a second NVMe M 2 SSD if my motherboard only has one slot?
Yes, you can. You will need an M 2 NVMe adapter that plugs into a PCIe x4 slot on your motherboard. These adapters are affordable and widely available. They let you add an extra NVMe drive even when your board has only one native M 2 slot.
Do I need to reinstall Windows to use a second NVMe SSD?
No, you do not. Windows will recognize the new drive automatically after you install it. You just need to initialize and format it through Disk Management. Your existing operating system and files remain untouched.
What size NVMe M 2 SSD should I buy for a second drive?
It depends on your needs. A 1TB drive is a great starting point for most users. If you store large files or games, consider a 2TB or larger drive. Check out the 2TB NVMe M.2 SSD options for high-capacity needs.
Will adding a second NVMe M 2 SSD slow down my first drive?
No, it will not. Each NVMe M 2 SSD operates independently through its own PCIe lanes. Adding a second drive does not reduce the speed of your first drive. Both drives will perform at their full rated speeds.
Do I need special software to manage two NVMe SSDs?
No special software is required. Windows Disk Management handles partitioning and formatting. You can also use free tools like CrystalDiskInfo to monitor drive health and speeds. These tools give you full visibility into both drives without any extra cost.
How do I know if my M 2 slot supports NVMe and not just SATA?
Check your motherboard manual or spec sheet. Look for the M 2 slot description. If it mentions PCIe or NVMe support, it will work with NVMe drives. Slots that only support SATA will be labeled accordingly. When in doubt, search your motherboard model online for confirmation.