Laptop Screw Types
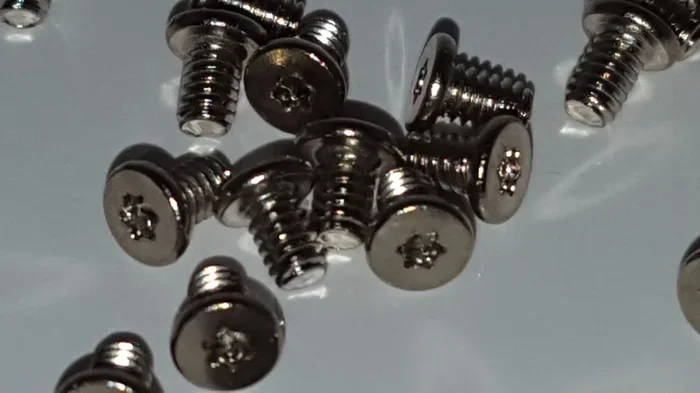
Understanding laptop screw types is essential for anyone who repairs, upgrades, or maintains a laptop. From tiny Phillips head screws to specialized Torx and pentalobe drivers, each screw serves a unique purpose in holding your laptop together. This guide covers every common laptop screw type, size, and tool you need for safe disassembly.
Laptops are complex machines made up of hundreds of tiny components. Among the smallest but most important parts are the screws that hold everything together. If you have ever tried to open your laptop for a repair or upgrade, you know how frustrating it can be when a screw strips or you mix up sizes. Laptop screw types vary by brand, model, and purpose. Knowing the right type makes the difference between a smooth repair and a damaged device.
Whether you are a student fixing a loose hinge, a tech enthusiast swapping in a new laptop NVMe M.2 SSD, or a professional doing routine maintenance, this guide has you covered. We will walk through every common screw type, the sizes you will encounter, the tools you need, and tips to avoid common mistakes. By the end, you will feel confident tackling any laptop disassembly project.
Key Takeaways
- Multiple screw types exist: Laptops use Phillips, Torx, pentalobe, and hex screws depending on the brand and model.
- Screw size matters: Using the wrong size screw can damage threads or strip the screw head entirely.
- Organization is key: Labeling and sorting screws during disassembly saves hours of frustration during reassembly.
- The right tools make a difference: A quality magnetic screwdriver set designed for laptop repair prevents stripped heads and accidental damage.
- M.2 SSDs need specific screws: Installing a M.2 NVMe SSD for laptop requires the correct screw size, often M2x3mm.
- Reusing screws is risky: Worn or damaged screws should be replaced to ensure a secure fit and proper grounding.
📑 Table of Contents
Why Laptop Screw Types Matter
Laptop manufacturers use different screws for a reason. Each screw type is chosen for its strength, size constraints, and the specific role it plays inside your machine. Using the wrong screw can lead to stripped threads, cracked chassis, or even electrical shorts. Understanding laptop screw types helps you work smarter and safer.
Laptops are built tight. Every millimeter counts inside that slim chassis. A screw that is too long can poke into a circuit board. A screw that is too short will not hold a component securely. This is why knowing the exact screw sizes for laptop is so important. A simple mix-up can turn a five-minute repair into a costly mistake.
Brand-Specific Screw Designs
Different laptop brands use proprietary screw designs to deter casual disassembly. Apple laptops, for example, use pentalobe screws on the bottom case. Many Windows laptops from Dell, HP, and Lenovo use standard Phillips or Torx screws. Some brands even use a mix of screw types within the same device. Always check your laptop model before starting any teardown.
Here is why this matters. If you buy a generic screwdriver set, it may not fit your laptop screws properly. A stripped screw head means you cannot remove or tighten that screw without special tools or professional help. Taking two minutes to identify your screw type before you start saves a lot of trouble later.
Common Laptop Screw Types
Most laptops use one of four main screw types. Each type has a unique shape and requires a specific driver. Let us break them down one by one.
Phillips Head Screws
Phillips head screws are the most common type found in laptops. They have a cross-shaped indentation on the top. You will find these in many Dell, HP, and Lenovo models. They come in sizes like PH0 and PH1 for laptops. A standard Phillips screwdriver works well, but a precision set gives you better control.
Phillips screws are easy to find and affordable. However, they can cam out, which means the driver slips out of the screw head under pressure. This can strip the screw or scratch the laptop chassis. Use gentle pressure and let the driver do the work.
Torx Screws
Torx screws have a star-shaped pattern. They are very common in modern laptops, especially in the middle and top sections. You will often see T5, T6, and T8 Torx sizes inside laptops. These screws offer excellent grip and are harder to strip than Phillips head screws.
Torx drivers come in different sizes. Always match the driver size to the screw. A T5 driver will not fit a T6 screw properly. Many laptop repair kits include a full set of Torx drivers in the common sizes. These screws are popular because they provide a secure hold without damaging easily.
Pentalobe Screws
Pentalobe screws have a five-pointed star shape. Apple uses them extensively on MacBook laptops. You will find them on the bottom case and near the battery connector. These screws require a special pentalobe screwdriver, which is different from a standard Torx driver.
If you own a MacBook, invest in a quality pentalobe bit set. These screws are small and can be tricky to remove. They also tend to be very tight from the factory. Using the wrong tool can easily damage the screw head, making removal much harder.
Hex Screws
Hex screws have a hexagonal shape and require an Allen key or hex driver. You will find these in some gaming laptops and larger models. They are less common than Phillips or Torx screws but still appear in certain brands. Hex screws provide a very secure hold and are common in areas that experience more stress, like hinge points.
A small hex driver set is a worthwhile addition to any laptop repair toolkit. These drivers are compact and fit snugly into the screw head. They reduce the risk of cam-out and provide excellent torque control.
Laptop Screw Sizes and Specifications
Screw size is just as important as screw type. Laptops use very small screws, and even a half-millimeter difference can cause problems. Here are the most common sizes you will encounter.
M2 Screws
M2 screws are among the smallest screws used in laptops. They are commonly used to secure M.2 SSDs, including a 512GB PCIe NVMe M.2 SSD for laptop or a 2TB NVMe SSD for laptop. The standard M2 screw length is usually 3mm. These tiny screws require a precision screwdriver to avoid stripping.
When installing an M.2 drive, always use the correct screw length. A screw that is too long can damage the SSD or the motherboard. Most M.2 SSDs come with the correct screws in the package, but it is smart to check before you start.
M2.5 and M3 Screws
M2.5 and M3 screws are slightly larger and are used for securing the laptop chassis, keyboard, or touchpad. M2.5 screws are very common across many laptop brands. M3 screws appear in some larger laptops or in areas that need a stronger hold. Always measure your existing screws with a ruler or caliper before purchasing replacements.
Using a screw that is even slightly too long can reach internal components and cause a short circuit. This is a serious risk that can permanently damage your laptop. Always double-check the length before driving any screw into place.
Screw Length Guide
Laptop screw lengths typically range from 2mm to 6mm. The most common lengths are 2.5mm, 3mm, and 4mm. The length you need depends on the thickness of the component and the panel you are securing. Here is a quick reference:
- 2mm screws: Used for very thin panels and small components.
- 2.5mm screws: Common for bottom covers and light brackets.
- 3mm screws: Standard for M.2 SSDs and most internal components.
- 4mm screws: Used for thicker panels and structural parts.
- 5mm to 6mm screws: Found in larger laptops for hinge areas and heavy-duty brackets.
Tools You Need for Laptop Screws
Having the right tools makes working with laptop screw types much easier and safer. You do not need an expensive setup, but a few quality tools will save you time and frustration.
Magnetic Screwdriver Set
A magnetic screwdriver is essential for laptop work. The magnet holds the screw in place while you drive it in. This prevents the screw from falling into the laptop chassis, where it can damage components or become nearly impossible to retrieve. Look for a set that includes both Phillips and Torx bits in small sizes.
Magnetic screwdrivers come in precision sizes designed specifically for electronics. Avoid using large household screwdrivers on laptop screws. The size mismatch can strip the screw head and make removal very difficult. A quality precision set usually costs under twenty dollars and is worth every penny.
Screw Organization Tools
When you disassemble a laptop, you will remove many small screws. They all look similar but have different lengths and types. Mixing them up during reassembly can cause serious problems. Use a screw organizer mat or a small container with compartments to keep each screw in its place.
Many repair kits include a magnetic mat with labeled sections. You can place each screw in its corresponding spot as you remove it. Take photos during disassembly to help you remember where each screw goes. This simple habit prevents mistakes and speeds up the entire process.
Anti-Static Wrist Strap
Static electricity can damage sensitive laptop components. An anti-static wrist strap grounds you while you work, preventing static discharge. This is especially important when you are handling the motherboard or other internal components near the screws. Wear the strap whenever you open up your laptop for any reason.
Even if you are only changing a screw near the edge of the laptop, static can still cause problems. It does not take much static electricity to damage a chip. A simple wrist strap costs a few dollars and adds an important layer of protection to your repair work.
How to Identify and Replace Laptop Screws
Sometimes you need to replace a damaged or lost laptop screw. Identifying the correct replacement starts with careful observation. Here is a step-by-step approach that works every time.
Step 1: Measure the Screw
Use a digital caliper or a precise ruler to measure the screw diameter and length. Measure in millimeters for accuracy. Note the screw type by looking at the head shape. Is it Phillips, Torx, pentalobe, or hex? Each type requires a different driver.
Write down your measurements. Even a small error can mean buying the wrong replacement. Take your time with this step. Getting the measurements right saves you from buying multiple screws and trying again.
Step 2: Check the Thread Pitch
Thread pitch refers to the spacing between the threads on the screw. Most laptop screws use a fine thread pitch. You can check this by counting the number of threads within a centimeter. Fine thread screws grip better in thin materials, which is exactly what you need inside a laptop chassis.
If you are unsure about the thread pitch, bring the old screw to a hardware store and compare it against their selection. Many electronics suppliers also sell laptop-specific screw kits with a variety of sizes and types pre-sorted for convenience.
Step 3: Purchase the Right Replacement
Buy replacement screws from a reputable electronics parts supplier. Avoid using random screws from a hardware store, as they may not have the correct thread pitch or length. Laptop screws are precision components, and using the wrong one can cause damage.
A quality laptop screw kit includes the most common sizes and types. These kits usually cost between ten and thirty dollars and include screws you will need for multiple repairs. They are a smart investment for anyone who works on laptops regularly.
Common Mistakes When Working with Laptop Screws
Even experienced people make mistakes when working with laptop screws. Here are the most common errors and how to avoid them.
- Using the wrong screwdriver: A loose-fitting driver strips the screw head quickly. Always use the exact size for your screw type.
- Forcing a stuck screw: If a screw will not turn, stop. Apply a drop of penetrating oil and wait a few minutes. Forcing it will only make things worse.
- Mixing up screw lengths: A long screw in the wrong spot can pierce a circuit board. Always return each screw to its correct position.
- Skipping the anti-static strap: Static damage may not show immediately but can cause mysterious failures weeks later.
- Not photographing the disassembly: Photos help you remember screw locations and orientations. This is especially helpful when you encounter screws that look similar but serve different purposes.
Avoiding these simple mistakes will protect your laptop and make your repair experience much smoother. Take your time, work carefully, and do not rush through the process.
Expert Tips for Working with Laptop Screws
Here are some pro tips that will make your laptop screw work easier and safer.
- Always power off and unplug your laptop before opening it. Remove the battery if possible. Working on a powered device risks electric shock and component damage.
- Use a soft, non-slip surface like a microfiber cloth to place screws and small parts on. This prevents them from rolling away or getting scratched.
- Apply gentle, steady pressure when driving screws. Let the driver do the work. Pressing too hard causes cam-out and stripped heads.
- Keep your screws in order as you remove them. Screw length and type often vary by location inside the laptop.
- Clean screw holes before reassembly with a soft brush or compressed air. Dust and debris can cause screws to fit loosely or damage threads.
- Consider a how to install M.2 NVMe SSD in laptop guide if you are working with storage drives, as the screw placement is very specific and easy to get wrong.
These tips come from years of repair experience. Following them will help you avoid the most common pitfalls and complete your laptop repairs with confidence.
Conclusion
Understanding laptop screw types is a fundamental skill for anyone who owns or works on laptops. From Phillips and Torx to pentalobe and hex screws, each type plays a specific role in keeping your device intact and safe. Knowing the correct sizes, using the right tools, and following careful practices will make every repair or upgrade smoother and safer.
Whether you are installing a new M.2 NVMe SSD screw size for storage, replacing a lost bottom cover screw, or simply maintaining your laptop, this knowledge puts you in control. Take your time, organize your screws, and invest in a good precision tool set. Your laptop will thank you for the care and attention.
With the right approach, working with laptop screws becomes second nature. Start with small projects, build your confidence, and expand your skills over time. You will save money on repairs and gain a deeper understanding of the device you use every day.
Frequently Asked Questions
What are the most common laptop screw types?
The most common types are Phillips head, Torx, pentalobe, and hex screws. Phillips and Torx screws are found in most Windows laptops, while pentalobe screws are standard on Apple MacBook models. Hex screws appear in some gaming and larger laptops, especially near hinge points and structural joints.
What size screws are used for M.2 SSDs in laptops?
M.2 SSDs typically use M2x3mm screws, which are very small and require a precision driver. These screws secure the SSD to the mounting bracket on the motherboard. Always check the M.2 NVMe SSD screw size specifications for your specific laptop model before purchasing replacements.
Can I use any screwdriver for laptop screws?
No, you should always use the correct driver size and type for each screw. Using a wrong-sized driver strips the screw head and can make removal very difficult. Invest in a precision magnetic screwdriver set that includes the common sizes like PH0, PH1, T5, T6, and pentalobe bits.
How do I organize screws when disassembling a laptop?
Use a magnetic screw organizer mat with labeled sections. Place each screw back in its spot as you remove it. Take photos during disassembly to help you remember locations. This prevents mixing up screws of different lengths, which can cause damage during reassembly.
What happens if I use a screw that is too long in my laptop?
A screw that is too long can pierce the motherboard or other internal components, causing a short circuit. This can permanently damage your laptop. Always measure screw length carefully and match it to the original screw or the manufacturer specification before installation.
Where can I buy replacement laptop screws?
Buy replacement screws from reputable electronics parts suppliers or manufacturer-specific parts stores. Avoid using random hardware store screws, as they may have the wrong thread pitch or length. Many universal laptop screw kits are available online and include the most common sizes and types for popular brands.