How to Wall Mount Speakers
Wall mounting speakers transforms your listening experience by saving space and improving sound quality. This guide walks you through every step, from choosing the right brackets to hiding wires cleanly. You will learn placement strategies, safety tips, and how to avoid common mistakes. Follow our simple instructions to achieve a professional-looking audio setup today.
Wall mounting speakers is a fantastic way to upgrade your home audio system. It clears up floor space and makes your room look tidy. Many people think it is a hard job, but it is actually quite simple. You just need the right tools and a bit of patience. In this guide, we will show you exactly how to wall mount speakers without stress.
Putting speakers on the wall can also improve your sound quality. When speakers are on stands, they might vibrate or get knocked over. Mounting them keeps them stable and secure. It also lets you place them at the perfect height for listening. Whether you have bookshelf speakers or small surround sound units, this project is worth doing. Let us dive into the steps you need to follow.
Key Takeaways
- Choose the right mount: Select brackets that match your speaker weight and size for safety.
- Plan your placement: Position speakers at ear level for the best sound experience.
- Gather proper tools: You need a drill, stud finder, level, and screwdriver for installation.
- Hide wires neatly: Use cable clips or in-wall tubing to keep your room looking clean.
- Check stability: Ensure screws are tight and speakers are secure before playing audio.
- Avoid drywall anchors: Always mount into studs for heavy speakers to prevent falling.
- Test before finishing: Play sound at low volume to check balance before hiding all cables.
📑 Table of Contents
Why You Should Wall Mount Your Speakers
There are many good reasons to put your speakers on the wall. First, it saves space. Floor stands take up room that you could use for furniture. Second, it looks cleaner. Cables can be hidden behind the wall or along the baseboard. This makes your living room or home theater look professional. Third, it can help your sound. Sound travels better when speakers are elevated.
Another benefit is safety. If you have pets or kids, floor speakers can get knocked over. A wall-mounted speaker stays put. This protects your equipment from damage. It also protects your family from falling objects. So, mounting them is a smart choice for many homes. If you are wondering how to mount speakers on wall surfaces safely, start with a good plan.
Space Saving Benefits
Modern homes often have limited space. Every inch counts. By moving speakers off the floor, you free up room for other things. You can add a couch, a plant, or just walk around more easily. This is especially helpful in small apartments or bedrooms. You get great sound without cluttering your floor.
Sound Quality Improvements
Sound quality changes when you move speakers. Wall mounting lets you position tweeters at ear level. This is where human hearing works best. It creates a clearer stereo image. You hear details in music and movies that you might miss otherwise. Proper placement makes a big difference in your listening experience.
Tools and Materials You Need
Before you start, you need to gather your tools. Having everything ready makes the job faster. You do not want to stop halfway to find a screwdriver. Here is a list of what you will need for this project.

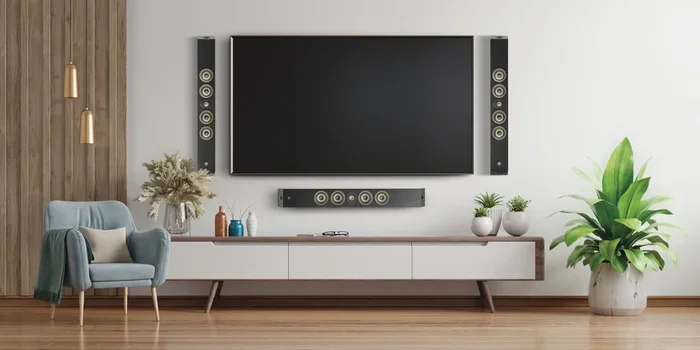
Visual guide about wall mounted speakers home
Image source: arylic.com
- Stud finder: To locate solid wood behind the drywall.
- Power drill: For making holes and driving screws.
- Level: To ensure your speakers hang straight.
- Measuring tape: For accurate placement.
- Screwdriver: For tightening bolts by hand.
- Wall anchors: Only if you cannot hit a stud.
- Cable clips: To manage your wires neatly.
- Pencil: To mark drill spots on the wall.
You might also need specific brackets. Some speakers come with mounting holes on the back. Others need universal brackets. Check your speaker manual first. If you need help with wiring, check out our guide on how to wire speakers to amp. This ensures your audio connection is just as good as your mounting.
Choosing the Right Brackets
Not all brackets are the same. Some are fixed, and some allow you to tilt the speaker. Tilting is good if you mount high. It lets you angle the sound down. Make sure the bracket fits your speaker size. A small bracket for a large speaker is dangerous. Always check the weight limit on the package.
Safety Gear
Safety is important when drilling. Wear safety glasses to protect your eyes from dust. If you are drilling high up, use a sturdy ladder. Do not stand on chairs or wobbly stools. Keep your workspace clean so you do not trip. These small steps keep you safe during the install.
Planning the Placement
Where you put your speakers matters a lot. You want the best sound, but you also want it to look good. Start by deciding where your listening spot is. This is where you sit to watch movies or listen to music. Your speakers should face this spot.
For stereo sound, place speakers on the left and right of your TV. They should form a triangle with your listening position. For surround sound, you need more speakers. Rear speakers go behind or to the side of your seat. If you need ideas for rear setups, read our article on how to tap into rear speakers for subs. This helps you understand rear audio placement better.
Ear Level Height
The golden rule is ear level. When you sit down, the tweeter should be at your ear height. This is usually about 3 to 4 feet off the ground. If you mount them too high, the sound goes over your head. Too low, and the sound feels muffled. Use a measuring tape to find the right spot.
Room Acoustics
Your room affects sound too. Hard walls bounce sound around. Soft furniture absorbs it. Try to avoid placing speakers right in the corner. Corners boost bass too much and make it boomy. Give them some space from the wall. About 6 to 12 inches is usually good. This keeps the sound clear and balanced.
Step-by-Step Installation Guide
Now comes the fun part. Follow these steps carefully to hang your speakers. Take your time and double-check everything. Rushing can lead to mistakes or damaged walls.
Step 1: Mark the Spot
Use your pencil to mark where the screws will go. Hold the bracket against the wall. Use your level to make sure it is straight. Mark the holes with the pencil. If you are mounting two speakers, measure the distance between them. Make sure both sides are even.
Step 2: Find the Studs
Use your stud finder to check your marks. You want to screw into wood studs, not just drywall. Drywall alone cannot hold heavy speakers. If your marks do not line up with studs, you may need to shift them slightly. If you must use drywall, use heavy-duty anchors. But studs are always better for safety.
Step 3: Drill Pilot Holes
Put on your safety glasses. Drill small pilot holes where you marked. This makes it easier to drive the screws. It also prevents the wood from splitting. Keep the drill straight so your brackets sit flat.
Step 4: Attach the Brackets
Place the bracket over the holes. Drive the screws in with your drill or screwdriver. Tighten them firmly. Give the bracket a gentle tug to test it. It should not move at all. If it wobbles, tighten the screws more.
Step 5: Hang the Speakers
Lift the speaker and hook it onto the bracket. Some speakers click into place. Others need screws to secure them to the bracket. Follow the manufacturer instructions. Once hung, check the level again. Adjust if needed before fully tightening everything.
If you are working with specific equipment like Nanit cameras or other tech, the mounting principles are similar. For example, learning how to remove Nanit camera from wall mount can teach you about handling wall-mounted tech safely. The same care applies to your audio gear.
Securing the Speakers
Some brackets hold the speaker by gravity. Others use safety screws. Always use safety screws if your system has them. This prevents the speaker from being knocked off accidentally. It is an extra layer of protection for your gear.
Dealing with Drywall
Sometimes you cannot hit a stud. Maybe the spot is perfect for sound but has no wood behind it. In this case, use toggle bolts or heavy-duty anchors. These spread the weight out behind the drywall. Do not use simple plastic plugs. They are not strong enough for speakers.
Managing Cables and Wires
Loose wires look messy and can be a tripping hazard. You want your setup to look clean. There are several ways to hide your speaker cables. You can paint them to match the wall. You can also use cable raceways. These are plastic channels that stick to the wall.
For a cleaner look, you can run wires inside the wall. This requires cutting holes and using in-wall rated cable. Be careful not to cut into electrical wires. If you are unsure, hire a pro. For simpler setups, surface-mounted clips work well. They keep wires tidy without cutting into your wall.
If you are connecting multiple devices, you might need help with connections. Check out our guide on how to connect multiple speakers to a receiver. This helps you manage your audio inputs while you sort out your wiring.
Cable Clips and Raceways
Cable clips are small and cheap. They hold wires against the baseboard or wall. Raceways are larger and hide the wire completely. You can paint raceways to match your wall color. This makes them almost invisible. Choose the option that fits your budget and look.
In-Wall Wiring
In-wall wiring looks the best. The wires disappear completely. You need special CL2 or CL3 rated cable for this. Regular speaker wire is not safe for inside walls. It can be a fire hazard. Always check local building codes before cutting into walls.
Common Mistakes to Avoid
Even easy projects can go wrong if you are not careful. Here are some common errors people make when learning how to wall mount speakers. Avoiding these will save you time and money.
- Ignoring stud locations: Mounting only on drywall can lead to falling speakers.
- Wrong height: Placing speakers too high or low hurts sound quality.
- Loose screws: Always tighten everything firmly to prevent wobbling.
- Messy wires: Leaving cables dangling makes the room look untidy.
- Wrong bracket size: Using small brackets for heavy speakers is dangerous.
- Skipping the level: Crooked speakers look bad and affect sound staging.
Take your time with each step. Double-check your measurements before drilling. It is easier to fix a pencil mark than a hole in the wrong spot. If you make a mistake, you can use spackle to fix small holes. But prevention is always better than repair.
Testing Before Finalizing
Before you hide all your wires, test the sound. Play some music and check the balance. Make sure both speakers are working. Check that the mounting is secure by gently pushing the speaker. If anything feels loose, fix it now. It is hard to reach once everything is closed up.
Weight Considerations
Know the weight of your speakers. Check the bracket specifications. If your speaker is 20 pounds, do not use a 10-pound bracket. Overloading a mount can cause it to fail. This is a serious safety risk. Always leave a little margin of safety in your weight rating.
Expert Tips for Better Sound
Mounting is just the start. To get the best sound, you need to tune your system. Here are some expert tips to help you out. These small adjustments make a big difference.
Tip 1: Toe-In the Speakers
Point your speakers slightly toward your listening seat. This is called toe-in. It improves the stereo image. You hear vocals and instruments more clearly. Experiment with the angle to find what sounds best.
Tip 2: Distance from Walls
As mentioned earlier, keep some distance from the back wall. This reduces bass boominess. If your room is small, you might need to keep them closer. Just listen and adjust until it sounds right.
Tip 3: Check Polarity
Make sure your wires are connected correctly. Positive goes to positive, and negative to negative. If you swap them, the sound will be thin. If you are unsure, learn how to check polarity on speakers with multimeter. This ensures your phase is correct.
Tip 4: Clean Your Equipment
Dust can affect performance over time. Keep your speakers clean. If you need advice on maintenance, see our guide on how to clean car speakers. The cleaning principles are similar for home gear too.
Room Calibration
Many modern receivers have auto-calibration. Use this feature if you have it. It uses a microphone to tune the sound to your room. It adjusts levels and distances for each speaker. This is a great way to get professional sound without being an expert.
Future Proofing
Think about future changes. You might want to add more speakers later. Leave some space in your wiring plan. Use connectors that are easy to swap. This makes upgrades easier down the road. Planning ahead saves you work later.
Conclusion
Learning how to wall mount speakers is a rewarding project. It improves your room and your sound. With the right tools and planning, anyone can do it. Remember to find studs, use a level, and hide your wires. Take your time and test everything before finishing.
Your home audio system deserves a great setup. Wall mounting gives you stability and style. Follow these steps, and you will enjoy your music and movies more. Now you are ready to transform your space with perfect speaker placement.
Frequently Asked Questions
Can I wall mount speakers without drilling holes?
Yes, you can use heavy-duty adhesive mounts for very light speakers. However, drilling into studs is much safer and more secure for most audio equipment. Adhesive options may fail over time with vibration.
What height should wall mounted speakers be?
You should position the tweeters at ear level when you are seated. This is typically between 3 and 4 feet from the floor. Proper height ensures the best stereo imaging and clarity.
Do I need special cables for in-wall speaker wiring?
Yes, you must use CL2 or CL3 rated cables for inside walls. Regular speaker wire is not fire-rated for in-wall use. Using the wrong cable can be a safety hazard and violate building codes.
How do I hide speaker wires on the wall?
You can use cable raceways, paintable clips, or run wires inside the wall. Raceways are easy to install and keep wires flush against the surface. In-wall wiring looks the cleanest but requires more work.
Can I mount heavy speakers on drywall?
It is not recommended to mount heavy speakers on drywall alone. You should always try to screw into wall studs for support. If studs are not available, use heavy-duty toggle bolts designed for high weight.
How do I check if my speaker mount is secure?
Gently push and tug on the mounted speaker to test stability. It should not move, wiggle, or pull away from the wall. If it feels loose, tighten the screws or reinforce the mounting bracket immediately.