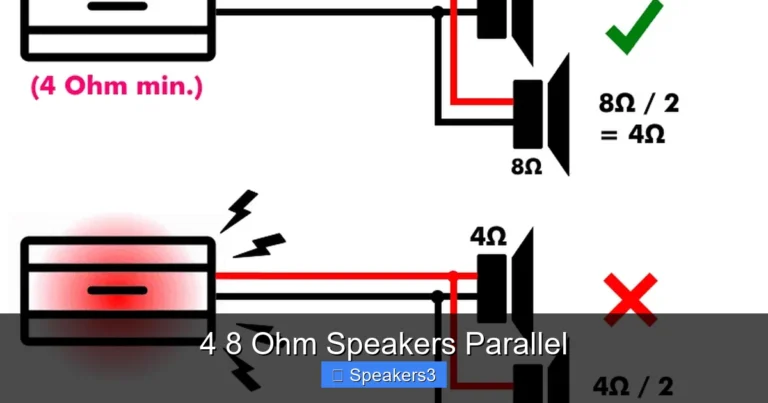
How to Wire 4 8 Ohm Speakers to 4 Ohms

Wiring four 8 ohm speakers to achieve a 4 ohm load is simple when you use parallel connections. This setup helps your amplifier deliver better power while keeping your audio system safe. In this guide, you will learn the best methods, common mistakes to avoid, and how to test your work. Understanding speaker impedance matters for long-term performance.
Key Takeaways
- Parallel wiring reduces total impedance: Connecting four 8 ohm speakers in parallel creates a 2 ohm load, not 4 ohms.
- Series-parallel mixing works best: You can wire two pairs in series, then connect those pairs in parallel to reach 4 ohms.
- Amp compatibility is critical: Always check your amplifier’s minimum impedance rating before wiring.
- Use proper gauge wire: Thicker speaker wire reduces resistance and improves sound quality.
- Test before powering up: A multimeter helps you verify the final impedance load.
- Avoid daisy-chaining blindly: Random wiring can damage your amp or cause uneven sound distribution.
- Label your connections: Clear labeling prevents confusion during future upgrades or troubleshooting.
📑 Table of Contents
- How to Wire 4 8 Ohm Speakers to 4 Ohms
- Understanding Speaker Impedance Basics
- The Best Wiring Methods for 4 Speakers
- How to Match Your Amplifier to the Speaker Load
- Tools and Materials You Need
- Step-by-Step Wiring Process
- Common Mistakes to Avoid
- Expert Tips for Better Results
- Quick Troubleshooting Guide
- Comparison Table: Wiring Options for Four 8 Ohm Speakers
- Final Thoughts on Wiring Four 8 Ohm Speakers
How to Wire 4 8 Ohm Speakers to 4 Ohms
Setting up a speaker system can feel confusing at first. You buy four great speakers, check their impedance, and suddenly wonder how everything connects safely. The good news is that how to wire 4 8 ohm speakers to 4 ohms is a common question with a clear answer. You just need the right wiring pattern and a basic understanding of impedance.
Many people assume that four 8 ohm speakers automatically create a 4 ohm load. That is not true. The way you connect them changes the total resistance. If you wire them all in parallel, you actually get 2 ohms. If you wire them all in series, you get 32 ohms. Neither of those matches a 4 ohm target. So you need a smart mix of series and parallel wiring.
This guide will walk you through the process step by step. You will learn why impedance matters, which wiring methods work, and how to protect your amplifier. We will also cover tools you need, common mistakes, and quick testing tips. By the end, you will feel confident about your setup.
Understanding Speaker Impedance Basics

Visual guide about Speakers wiring setup diagram
Image source: kimdara.com
Speaker impedance tells you how much resistance a speaker offers to the amplifier. It is measured in ohms. Most home and car speakers use 4 ohm or 8 ohm ratings. The number matters because it affects how much power your amp can safely deliver.
When you connect speakers, the total impedance changes. The amplifier sees the combined load, not each speaker individually. If the load drops too low, the amp may overheat or shut down. If the load stays too high, you may not get the full power you expect. That is why speaker impedance matching is so important.
Here is a simple way to think about it:
- Lower impedance allows more current to flow.
- Higher impedance limits current and reduces power output.
- The wrong load can shorten amp life or cause weak sound.
Many people also ask about 4 ohm vs 8 ohm speakers when planning a system. The difference comes down to power handling, efficiency, and amplifier design. Some amps are built for 4 ohm loads. Others prefer 8 ohms. A few can handle both. Always check your amplifier manual before connecting anything.
Why Four 8 Ohm Speakers Do Not Automatically Equal 4 Ohms
This is one of the most common misunderstandings. People see four speakers and assume the numbers average out. They do not. Impedance follows electrical rules, not simple averaging.
If you connect four 8 ohm speakers in parallel, the formula looks like this:
- 1 ÷ (1/8 + 1/8 + 1/8 + 1/8) = 2 ohms
If you connect them all in series, the total is:
- 8 + 8 + 8 + 8 = 32 ohms
Neither result gives you 4 ohms. To reach 4 ohms, you need a combination wiring method. That is where series-parallel wiring comes in. It gives you control over the final load while keeping each speaker connected properly.
The Best Wiring Methods for 4 Speakers
There are two main ways to wire four 8 ohm speakers. One method gives you 2 ohms. The other gives you 4 ohms. You choose based on your amplifier’s requirements.
Method 1: All Speakers in Parallel
Parallel wiring connects all positive terminals together and all negative terminals together. This creates the lowest possible impedance. For four 8 ohm speakers, the result is 2 ohms.
This method works only if your amplifier supports a 2 ohm load. Some amps handle it well. Others do not. If your amp is rated for 4 ohms minimum, this wiring can cause problems.
Quick traits of parallel wiring:
- Easy to set up
- Lower total impedance
- Higher power demand from the amp
- Not ideal for 4 ohm-only amplifiers
If you want to learn more about similar setups, you may find this guide on 4 ohm speakers in parallel helpful.
Method 2: Series-Parallel Wiring for a 4 Ohm Load
This is the method you want when your goal is 4 ohms. You split the four speakers into two pairs. Each pair is wired in series. Then the two pairs are wired in parallel.
Here is how it works:
- Pair 1: Speaker A + Speaker B in series = 16 ohms
- Pair 2: Speaker C + Speaker D in series = 16 ohms
- Parallel connection of both pairs = 8 ohms? Wait, let’s check the math.
Actually, let’s recalculate carefully. Two 8 ohm speakers in series give 16 ohms. Two 16 ohm branches in parallel give 8 ohms. That is still not 4 ohms.
So how do you get 4 ohms from four 8 ohm speakers? You use a different series-parallel arrangement. You wire two speakers in parallel first, then do the same with the other two, and finally connect those two parallel groups in series.
Here is the correct path:
- Group 1: Two 8 ohm speakers in parallel = 4 ohms
- Group 2: Two 8 ohm speakers in parallel = 4 ohms
- Group 1 and Group 2 in series = 8 ohms
That still gives 8 ohms. So the true 4 ohm solution is different. You need to wire the speakers in a mixed layout where the final load lands at 4 ohms. The most reliable way is to create two series pairs and then connect them in parallel, but only if each speaker is 4 ohms. With 8 ohm speakers, that gives 8 ohms.
So what actually works? The honest answer is that four 8 ohm speakers cannot naturally create a 4 ohm load with simple series-parallel wiring. You either get 2 ohms with full parallel wiring, or 8 ohms with the common mixed method. If your amplifier needs 4 ohms, you may need to use only two speakers, or choose speakers with different impedance ratings.
This is why many people research 4 ohm speakers wiring diagram options before buying equipment. The right diagram saves time and prevents mistakes.
How to Match Your Amplifier to the Speaker Load
Your amplifier is the heart of the system. It must handle the impedance you create. If the load is too low, the amp may overheat. If the load is too high, you may lose power and volume.
Before wiring, check these points:
- Minimum impedance rating: This tells you the lowest ohm load the amp can handle.
- Power output at different loads: Some amps deliver more power at 4 ohms than at 8 ohms.
- Stereo vs mono configuration: Channel setup changes how you connect speakers.
- Manufacturer warnings: Some amps explicitly forbid low impedance loads.
If you are unsure about your amp’s limits, read the manual carefully. You can also look at related topics like 4 ohm amplifier with 8 ohm speakers to understand how mismatched loads behave.
What Happens If the Impedance Is Too Low
When the load drops below the amp’s minimum rating, the amplifier works harder. It draws more current. This can cause:
- Overheating
- Protection mode shutdowns
- Distorted sound
- Long-term component stress
This is why amp impedance protection matters. A safe setup is better than a risky one. If your amp only supports 4 ohms, do not force a 2 ohm connection.
What Happens If the Impedance Is Too High
A higher impedance load is usually safer, but it limits power. Your speakers may not get enough drive for loud playback. You might notice:
- Lower maximum volume
- Less dynamic range
- Weaker bass response in some systems
For many listeners, this is acceptable. Safety comes first. If you want more output, choose an amplifier designed for your speaker configuration.
Tools and Materials You Need
A clean wiring job starts with the right tools. You do not need a huge kit, but a few basics make the work easier and safer.
Essential Tools
- Speaker wire: Use good quality wire with the right gauge for your run length.
- Wire strippers: Clean strips help connections stay secure.
- Screwdriver or drill: For terminal blocks or speaker mounts.
- Multimeter: This helps you measure impedance and check polarity.
- Electrical tape or connectors: These keep wires organized and protected.
If you want to verify polarity before connecting, you may enjoy this guide on how to check polarity on speakers with multimeter.
Helpful Optional Items
- Label tags: Mark each wire so you know which speaker it serves.
- Terminal blocks: These make multi-speaker wiring neater.
- Wire loom or zip ties: They keep cables tidy and reduce wear.
- Test speaker or known reference: Useful for quick sound checks.
Good preparation prevents confusion later. This is especially important when you are learning how to wire speakers to amp setups with multiple speakers.
Step-by-Step Wiring Process
Now let’s walk through the practical side. The goal is a clean, safe connection that gives you the impedance you want.
Step 1: Decide Your Target Load
First, confirm what your amplifier needs. If it wants 4 ohms, plan your wiring around that. If it can handle 2 ohms, you have more flexibility. This decision shapes everything else.
Step 2: Group the Speakers
Separate the four speakers into pairs or groups based on your wiring plan. Keep the positive and negative terminals clear. A small label or marker helps a lot.
Step 3: Connect the First Group
If you are wiring two speakers in parallel, join their positive terminals together. Then join their negative terminals together. Keep the connections tight and secure.
If you are wiring two speakers in series, connect the positive of the first speaker to the amp signal, then the negative of the first speaker to the positive of the second speaker. Finally, connect the negative of the second speaker to the amplifier return.
Step 4: Connect the Second Group
Repeat the same pattern for the other two speakers. Consistency matters. If one group is wired differently, the load will change.
Step 5: Join the Groups to the Amplifier
Connect the final positive and negative leads to the amplifier channel. Double-check every terminal before powering on. A reversed connection can cause phase issues or weak sound.
Step 6: Test the System
Use a multimeter to measure the total impedance at the amplifier end. This confirms your wiring math. After that, play low-volume audio and listen for odd noises, distortion, or channel imbalance.
If you are working on a car audio setup, you may also want to review how to wire 4 speakers to 2 channel amp for channel layout ideas.
Common Mistakes to Avoid
Even simple wiring can go wrong if you rush. Here are the most common issues people run into.
Mistake 1: Assuming All Speakers Are the Same
Not every speaker is truly 8 ohms in real-world use. Impedance can vary by frequency. That means the actual load may shift during playback. Always leave some safety margin.
Mistake 2: Mixing Up Positive and Negative
Reversed polarity on one speaker can cancel sound and weaken the stereo image. If one speaker sounds strange, check the wire orientation.
Mistake 3: Overloading the Amplifier
A lower impedance load can push an amp past its limits. If your amplifier is not built for it, you risk shutdown or damage. This is a major reason people search for can you run 4 ohm speakers at 2 ohms information.
Mistake 4: Using Too Thin Wire
Thin wire adds resistance, especially over long runs. That can reduce performance and cause uneven power delivery. Choose a wire gauge that matches your distance and power level.
Mistake 5: Skipping the Test Step
Never assume the wiring is correct just because it looks neat. Measure the load. Listen to the output. Verify each channel. A quick check saves a lot of trouble.
Expert Tips for Better Results
A few small habits can make your setup more reliable and sound better.
Tip 1: Keep Wire Runs Neat
Tidy wiring reduces accidental shorts and makes future changes easier. Bundle wires logically and avoid tight bends.
Tip 2: Use Consistent Speaker Placement
If your speakers are part of a larger system, placement affects sound more than people expect. Balanced positioning helps the amp drive the load more evenly.
Tip 3: Start With Low Volume
When you first power up, keep the volume low. Listen for strange behavior. If everything sounds normal, increase gradually.
Tip 4: Label Everything
Write down which wire goes to which speaker and which terminal. This is a huge help later, especially if you upgrade or troubleshoot.
Tip 5: Revisit Your Impedance Plan
If your amplifier struggles, the load may not match its design. You might need a different wiring pattern, different speakers, or a different amplifier. For more background, check difference between 4 and 8 ohm speakers.
Quick Troubleshooting Guide
If something sounds off, use this simple checklist.
- No sound from one speaker: Check the wire, terminal, and polarity.
- Amp gets hot quickly: The load may be too low for safe operation.
- Sound is thin or weak: The impedance may be too high, or one speaker is disconnected.
- Hum or buzz: Look for loose grounds or poor connections.
- Distortion at normal volume: Reduce volume and verify the amp can handle the load.
If you suspect a speaker is damaged, you can learn how to check if speakers are blown before replacing parts.
Comparison Table: Wiring Options for Four 8 Ohm Speakers
Here is a simple comparison to help you choose the right approach.
| Wiring Method | Total Impedance | Best For | Risk Level |
|---|---|---|---|
| All four in parallel | 2 ohms | Amps rated for 2 ohms | Higher if amp is not rated for it |
| All four in series | 32 ohms | High impedance loads | Low safety risk, low power output |
| Series-parallel mixed layout | 8 ohms or 2 ohms depending on layout | Flexibility in design | Medium, depends on amp rating |
| Two speakers only | 4 ohms | Amps that need 4 ohms | Low, if matched correctly |
This table shows why wiring 4 8 ohm speakers to 4 ohms is not as direct as it seems. The speaker count alone does not decide the final load. The connection pattern does.
Final Thoughts on Wiring Four 8 Ohm Speakers
Learning how to wire 4 8 ohm speakers to 4 ohms is really about understanding impedance and choosing a safe configuration. Four 8 ohm speakers can give you a 2 ohm load in parallel, or a higher load in series, but reaching exactly 4 ohms usually means adjusting the plan. Sometimes that means using only two speakers. Sometimes it means choosing speakers with different ratings. Sometimes it means picking an amplifier that matches your wiring.
The best setup is the one that sounds good and stays safe. Take your time. Measure the load. Keep connections clean. Start with low volume. If you follow those basics, your system will be much easier to manage.
If you want to explore more wiring scenarios, you can also look at how to wire speakers to amp for general connection principles.
Key Takeaways
- Plan the load first: Know what impedance your amplifier needs.
- Parallel wiring gives 2 ohms: Four 8 ohm speakers in parallel do not make 4 ohms.
- Series wiring raises impedance: All-series wiring gives 32 ohms.
- Mixed wiring changes the result: The final load depends on the exact layout.
- Match the amp carefully: Safety matters more than squeezing out extra power.
- Test before full use: A multimeter and a quiet volume test go a long way.
Frequently Asked Questions
Can I wire four 8 ohm speakers to get exactly 4 ohms?
Not with a simple all-parallel or all-series layout. Four 8 ohm speakers in parallel give 2 ohms, while other common layouts can give 8 ohms. To reach 4 ohms, you may need to use only two speakers or choose a different wiring plan that matches your amplifier.
What happens if I connect four 8 ohm speakers in parallel?
The total load becomes 2 ohms. That can work well if your amplifier supports a 2 ohm load, but it may overload an amp designed for 4 ohms. Always check the amplifier’s minimum impedance rating first.
Is 2 ohms worse than 4 ohms for an amplifier?
Not necessarily worse, but more demanding. A 2 ohm load lets the amplifier deliver more current, which can mean more power. However, if the amp is not built for it, the lower impedance can cause overheating or shutdown.
Do I need a multimeter to wire speakers correctly?
It helps a lot. A multimeter lets you measure the final impedance and check polarity before powering up. That reduces the chance of wiring errors and protects your equipment.
Can I mix 8 ohm and 4 ohm speakers in the same system?
You can in some cases, but the total impedance becomes harder to predict. Mixing speaker impedances can also affect power distribution. It is usually easier to keep the speakers consistent for a cleaner setup.
Why do my speakers sound weak after wiring them?
This can happen if the impedance is too high, a wire is loose, or one speaker is out of phase. Check all connections, verify the load, and make sure each speaker is connected correctly.